You know those days when regular pizza just doesn’t cut it?
Yeah, me too.
Like, you want the pizza experience—melty cheese, flavorful toppings, savory sauce—but your body’s all, “Maybe not with that fluffy white crust, please.”
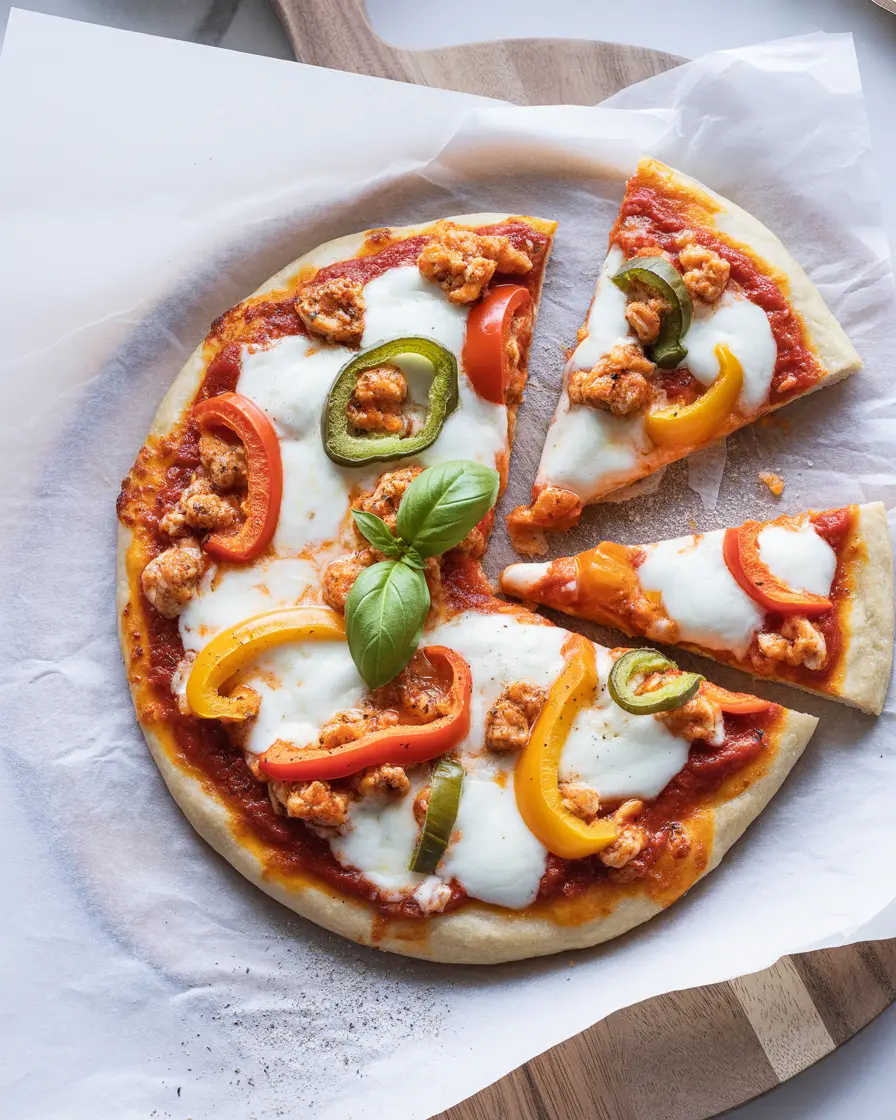
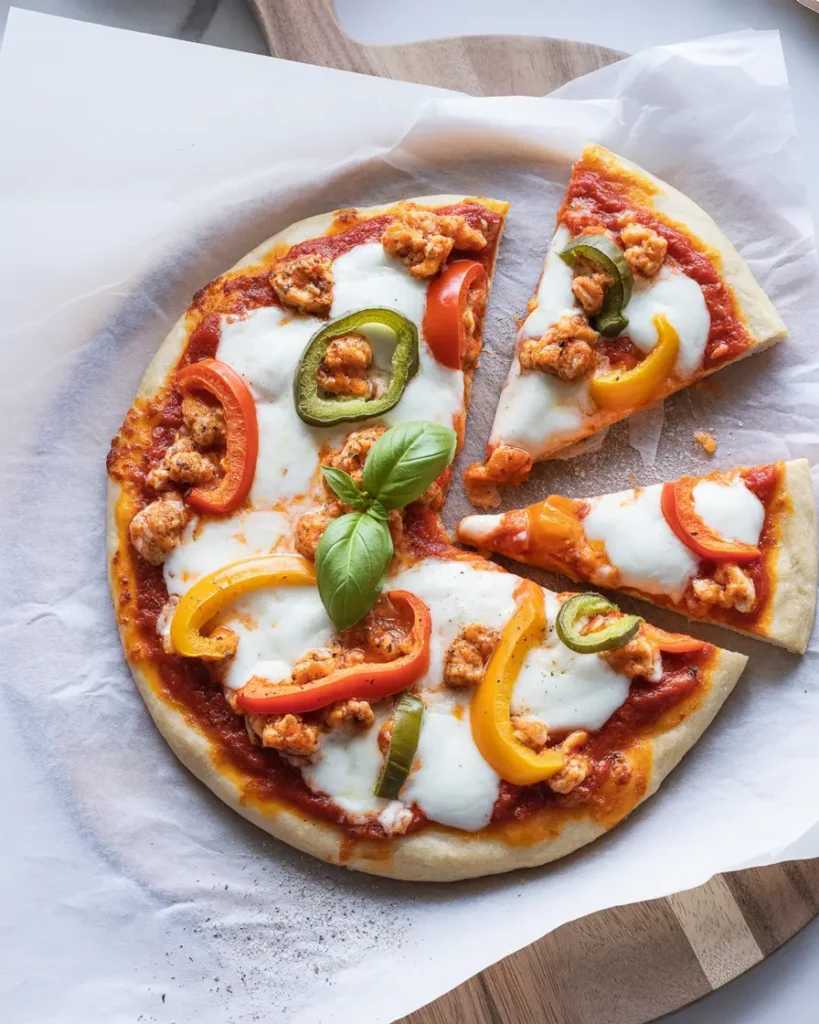
Enter the hero we never knew we needed: Ground Chicken Pizza Crust.
Now listen. I get it. Ground chicken doesn’t scream “pizza night” in the traditional sense. But hear me out. This thing is good. Like crispy-on-the-edges, protein-loaded, fully customizable good. Perfect for when you want pizza… without feeling like you just swallowed a bowling ball.
So today I’m going to show you how to make it. Not just “how,” but all the helpful things that make it actually turn out great on your first go.
No fancy ingredients. No complicated methods. Just a surprisingly simple way to turn ground chicken into something magical (and yes, pizza counts as magical).
Let’s go.
What You’ll Need
Here’s what’s going in the crust:
| Ingredient | Amount | Notes |
|---|---|---|
| Ground chicken | 1 lb | Try to go for the kind with a little fat – not super lean |
| Italian seasoning | 1 tbsp | Mix of oregano, basil, thyme works great |
| Garlic | 2 cloves | Minced – or sub with ½ tsp garlic powder |
| Salt | ½ tsp | Adjust to taste |
| Black pepper | ¼ tsp | Optional, but adds a nice balance |
| Shredded Italian cheese blend | ⅔ cup | Helps with flavor and structure |
| Shredded Parmesan | ⅓ cup | Try not to use the powdered stuff – it won’t hold as well |
| Egg (optional) | 1 | Helps bind, not required but recommended |
Toppings are totally up to you. Some favorites:
- Pizza sauce (¼–⅓ cup is enough)
- Mozzarella cheese (about 1 cup)
- Your favorite toppings (veggies, pepperoni, etc.)
Tools You’ll Need
You don’t need a ton of fancy stuff. Just:
- Oven
- Baking sheet or pizza stone
- Parchment paper
- Large mixing bowl
- Measuring cups and spoons
- Spatula or your hands (honestly, hands work better for mixing)
Why This Works (aka What Makes It Awesome)
Ok, let’s be real. A chicken crust sounds… questionable at first. But it works because:
- The cheese acts as glue. Like a tasty glue.
- The seasonings make sure it doesn’t taste like bland chicken breast.
- Par-baking (aka partially baking before topping) keeps it crisp instead of soggy.
Think of it as a flat, crispy, slightly chewy base that just happens to be made of meat. But tastes nothing like a meatloaf.
And if you’ve been trying to cut carbs, eat gluten-free, or just add more protein to your meals without feeling like you’re on a sad diet… this recipe fits in beautifully.
Let’s Make It – Step-by-Step
1. Preheat your oven
Set your oven to 400°F. If you’re going for extra crispiness, 425°F works too.
2. Prep your pan
Line a baking sheet with parchment paper. This is not optional—trust me, chicken sticks.
Give the parchment a quick spray with nonstick spray or brush it with a little oil.
3. Mix your crust ingredients
In a large bowl, combine the ground chicken, garlic, Italian seasoning, salt, pepper, shredded cheese blend, Parmesan, and egg (if using).
Use your hands or a spatula to mix everything thoroughly. You want the mixture uniform, with the cheese and seasoning well distributed.
4. Shape the crust
Plop the mixture onto your prepared parchment.
Use your hands or a spatula to press it into a flat, even circle or rectangle. You’re aiming for about ¼-inch thick—thin, but not paper-thin.
Pro tip: Cover the top with another piece of parchment and roll it flat with a rolling pin if you want that perfect pizza shape. Then peel the top parchment off.
5. Bake the crust solo first
Slide the crust into your oven and bake for 15 to 20 minutes. You’re looking for a firm, golden bottom and edges that are starting to brown.
Optional step: Pat the crust with a paper towel right after baking to remove excess moisture. Totally optional, but it helps crisp things up.
6. Add your toppings
Spread a thin layer of sauce. Sprinkle on cheese. Add your favorite toppings. Don’t overload it with watery veggies unless you’ve pre-cooked them (looking at you, mushrooms and bell peppers).
7. Bake again
Return the pizza to the oven for 8 to 10 minutes, or until the cheese is melted and bubbly.
If you want it extra bubbly and golden, turn on the broiler for 1–2 minutes at the end. Just watch closely—burnt cheese happens fast.
8. Let it rest, then slice
Let your pizza rest for about 5 minutes after baking. This helps the crust set up a bit more. Then slice and devour.
Pro Tips From My Kitchen
- Dark meat = better texture
Ground chicken breast works, but tends to dry out. If you can find ground chicken thigh or a blend, it holds up better and tastes juicier. - Skip the powdered Parmesan
That green can of grated cheese? It won’t melt or bind. Go for the shredded kind you find near the deli. - Season like you mean it
This crust can handle flavor. Add extra garlic powder, onion powder, or crushed red pepper if you want a kick. - Double the batch
Make two crusts and freeze one. It’s no extra work and it’ll make future you very happy. - Broil to finish
That quick broil at the end? Game-changer. It gives the top that beautiful golden color you want from a legit pizza.
Substitutions & Variations
| Instead of… | Try this… |
|---|---|
| Ground chicken | Ground turkey (add olive oil for moisture) |
| Parmesan | Nutritional yeast (for dairy-free) |
| Cheese blend | Dairy-free cheese alternative |
| Egg | 1 tbsp ground flax + 2.5 tbsp water (mix and let gel) |
| Pizza sauce | Pesto, BBQ sauce, or even buffalo sauce |
This recipe is naturally gluten-free and low-carb. Want to make it Whole30 or paleo? Omit the cheese and use compliant sauce.
Want to make it spicy? Add crushed red pepper flakes or cayenne to the crust mixture.
Make-Ahead Tips
- Bake the crust ahead of time. Let it cool, wrap tightly, and refrigerate for up to 3 days or freeze for up to 2 months.
- Reheat directly from frozen at 400°F for 10–12 minutes, then add toppings and bake again.
- Prep your toppings in advance so pizza night is literally just assemble and bake.
Storage & Leftovers
- Fridge: Store slices in an airtight container for up to 3–4 days.
- Freezer: Wrap slices individually and freeze up to 2 months.
- Reheating: Best in the oven or toaster oven at 375°F until hot and crisp. Microwave works in a pinch, but you’ll lose some of the crust crispiness.
Bonus Nutrition Breakdown (Per Serving – Approximate)
| Serving Size | Calories | Protein | Carbs | Fat |
|---|---|---|---|---|
| 1 slice (¼ of pizza) | 230 | 28g | 3–4g | 12g |
Varies slightly based on toppings and cheese used
FAQ Time
Can I use cooked shredded chicken instead of ground?
Technically yes, but it won’t hold together as well. You’d need to pulse it in a food processor and add more binder (like an extra egg or more cheese).
What if I don’t have parchment paper?
Use foil brushed with oil, or a silicone baking mat. Just know it might stick more.
Is it actually crispy?
Yup, especially on the edges. For max crisp, make sure it’s thin and broil at the end.
Can I skip the cheese in the crust?
You can, but it won’t hold as well. Try adding more egg or using a dairy-free meltable cheese if needed.
How do I keep it from being soggy?
Bake the crust until it’s really firm. And blot off excess moisture before adding toppings.
Wrap Up
Alright. You’ve got the plan, the tips, the swaps, and the know-how. All that’s left?
Make the pizza.
Seriously—don’t just pin this and forget it. Ground chicken pizza crust is one of those recipes that sounds weird until you try it. And then suddenly you’re making it once a week and telling your friends about it.
So go for it. Load it up with your favorite flavors, bake it till golden, and enjoy every bite.
And when you do—come back and tell me how it went. What toppings you used. What you changed. What worked, what didn’t. Or ask me your questions—I’ve probably made this crust more times than I should admit.
Because pizza? It’s kind of my thing. And now… it’s yours too.