Ok, first off—can we all just agree that pizza is one of the greatest inventions of all time?
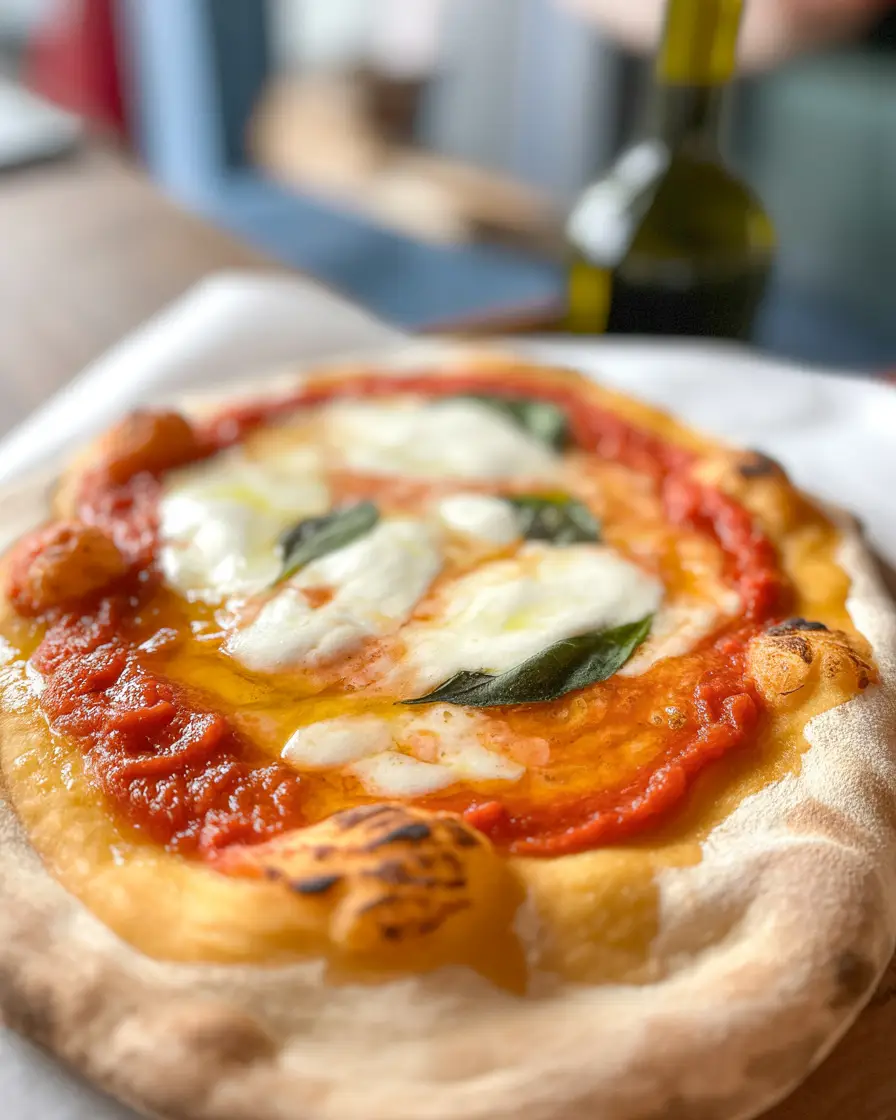
And not just any pizza. We’re talking about that slightly chewy, soft-in-the-middle, crisp-on-the-bottom, beautifully blistered, classic Neapolitan-style pizza. The kind that makes you feel like you’re sitting in a little Italian café somewhere—wine glass in hand, sun dipping behind the horizon, tomato-sauced dreams coming true.
But here’s the thing…
Most Neapolitan dough recipes are pretty high-maintenance. They ask for overnight rises, specific types of flour you’ve never heard of, and kitchen gear that most of us don’t have casually lying around.
That’s why today, I’m giving you a recipe that brings all the joy of Neapolitan pizza but cuts down the wait time. You’ll still get that signature texture and flavor, but with a little shortcut that makes this recipe totally doable on a weeknight.
Yep, this is your quick Neapolitan pizza dough. And it’s about to become your new favorite thing.
What You’ll Need
So here’s the deal—you don’t need anything fancy. Just some pantry staples, a bowl, and maybe an appetite for good things.
| Ingredient | Amount | Notes |
|---|---|---|
| All-purpose flour | 4 cups | You can use “00” flour if you’re feeling fancy |
| Instant yeast | 1 teaspoon | Make sure it’s not expired! |
| Salt | 1½ teaspoons | Regular sea salt is perfect |
| Warm water | 2 cups | Around 100°F, not hot |
| Olive oil | 2 tablespoons | For a touch of richness |
That’s it. Really.
If you have parchment paper, great. If you don’t, that’s fine too. We’re making this work.
Let’s Talk Tools
Just to get it out of the way, here are the basics:
- Large mixing bowl
- Measuring cups and spoons
- Wooden spoon or dough hook
- Kitchen towel or plastic wrap
- Baking sheet (if you don’t have a pizza stone)
- Parchment paper (not required but helps)
Nothing intimidating. No special equipment. Just you and some simple tools.
Before We Dive In—Let’s Talk Expectations
This isn’t a “just throw it together in 20 minutes” kind of dough.
It’s faster than traditional Neapolitan dough, yes. But it still needs a little time to rise so you get that texture—that chew, that structure.
Plan on about 2.5 to 3 hours total, most of which is hands-off. That means you can get things going before work ends, or while bingeing a show, and be pulling pizza out of the oven by dinner.
Win.
The Real Steps (and Yes, They’re Simple)
Step 1: Mix It All Together
In your big mixing bowl, combine the flour, salt, and yeast. Give it a quick stir to evenly distribute.
Then pour in the warm water and olive oil. Start mixing with a spoon, then use your hands to pull everything into a sticky dough.
It’s going to look like a bit of a mess at first. That’s normal. Sticky is good.
Let it rest for 5–10 minutes right there in the bowl.
Step 2: Knead Without Getting Frustrated
You can knead this by hand for about 8–10 minutes on a floured surface, or use a stand mixer if that’s more your thing.
The goal: a smooth, elastic dough that bounces back when you press it gently.
If it’s sticking like crazy, dust your hands with a bit more flour. But don’t overdo it—too much flour makes the dough heavy and dry. We’re after light and chewy.
Step 3: Let It Rise
Form the dough into a ball, oil your bowl lightly, and place the dough back in.
Cover it with a towel or plastic wrap and let it rise in a warm, draft-free place for about 1.5 to 2 hours. It should double in size.
No warm spot in your kitchen?
Turn on your oven light and place the bowl inside the oven with the door closed. It works like a charm.
Step 4: Divide and Rest
Once it’s risen, turn the dough out onto a lightly floured surface.
Divide it into 3 or 4 equal parts, depending on how big you want your pizzas. Roll each piece into a ball.
Let the dough balls rest for about 30 minutes under a damp towel. This lets the gluten relax, so the dough is easier to shape.
Step 5: Stretch, Don’t Roll
When you’re ready to bake, preheat your oven to 500°F (or as hot as it’ll go). Place a baking sheet or pizza stone inside to heat up.
Grab a piece of dough and, using your fingertips, gently push from the center outward to stretch it into a circle. You want a thin middle and a slightly puffy edge.
No rolling pins here. That’s a Neapolitan no-no.
Place your stretched dough on a piece of parchment paper for easy transfer.
Step 6: Top and Bake
Top with a light smear of tomato sauce, fresh mozzarella, a drizzle of olive oil, maybe a sprinkle of basil if you’re feeling fancy.
Slide the parchment (with pizza) onto the hot baking sheet or stone.
Bake for about 7–10 minutes until the crust is puffed, golden, and a bit blistered.
Take it out. Try not to eat the entire thing before it cools. (Or do. I don’t judge.)

Pro Tips From My Kitchen to Yours
- Don’t overload the toppings. Less is more here. The crust is the star. Let it shine.
- Preheat the baking sheet. This is how you get that nice bottom crust without a pizza stone.
- Keep the dough moist. Dry dough won’t rise as well and tastes bland. Sticky is ok.
- Use parchment paper. Makes transferring to the oven about 100x easier.
- Add toppings right before baking. Wet ingredients sitting on raw dough = soggy crust.
Substitutions and Variations
| Need to switch it up? | Try this instead: |
|---|---|
| Gluten-free | Use a 1:1 GF flour blend, but adjust water slightly |
| Whole wheat | Swap in 1 cup whole wheat for added flavor and fiber |
| Olive oil substitute | Avocado oil or melted butter (just for fun) |
| Vegan toppings | Nutritional yeast + roasted veggies work great |
| Cheese overload | Just… go for it. No one’s stopping you. |
Make-Ahead Tips (Because Sometimes You Just Can’t Wait)
- Refrigerate: After the first rise and dough ball shaping, refrigerate dough for up to 3 days. Let it come to room temp before baking.
- Freeze: Wrap dough balls individually and freeze up to 3 months. Thaw in the fridge overnight, then bring to room temp.
- Par-bake crusts: Bake plain dough (no toppings) for 5 mins, cool, and freeze. Instant pizza night later.
Nutrition Basics
Just in case you’re curious:
| Per dough ball (approx.) | Amount |
|---|---|
| Calories | 400 |
| Carbohydrates | 80g |
| Protein | 10g |
| Fat | 6g |
| Fiber | 2g |
These numbers shift depending on your toppings, of course. But it’s a solid base if you’re tracking anything.
What About Leftovers?
- Store leftover dough in the fridge (airtight container) for up to 3 days.
- Baked pizza keeps well in the fridge for 2–3 days.
- Reheat slices in a hot skillet or oven (not the microwave) to keep that crust texture.
Want to get wild? Use extra dough for cheesy breadsticks or mini calzones.
FAQ Time
Can I use active dry yeast instead of instant?
Yes! Just dissolve it in the warm water first and let it sit for 5–10 minutes before mixing with the flour.
What if I don’t have a pizza stone or baking steel?
Preheating a baking sheet gives a similar result. Works great.
Can I let the dough rise overnight instead?
Absolutely. Use cold water, reduce the yeast a little, and pop it in the fridge overnight. Bring it to room temp before using.
Can I grill this pizza?
Yes! Shape the dough, grill one side first, flip it, then add toppings and close the lid.
Wrap Up
So that’s it. Quick Neapolitan pizza dough that actually delivers on taste, texture, and ease. You’re not spending days on this. You’re not buying a backyard pizza oven. But you’re still getting that satisfying, chewy crust with the crisp edges and the kind of flavor that makes you say, “Dang, I made this?”
Because yeah—you did.
Give it a try, and when you do, let me know how it turned out. Leave a comment, ask questions, or just tell me your favorite pizza topping. Let’s talk pizza.
And hey, if you eat the whole thing in one sitting?
Same.