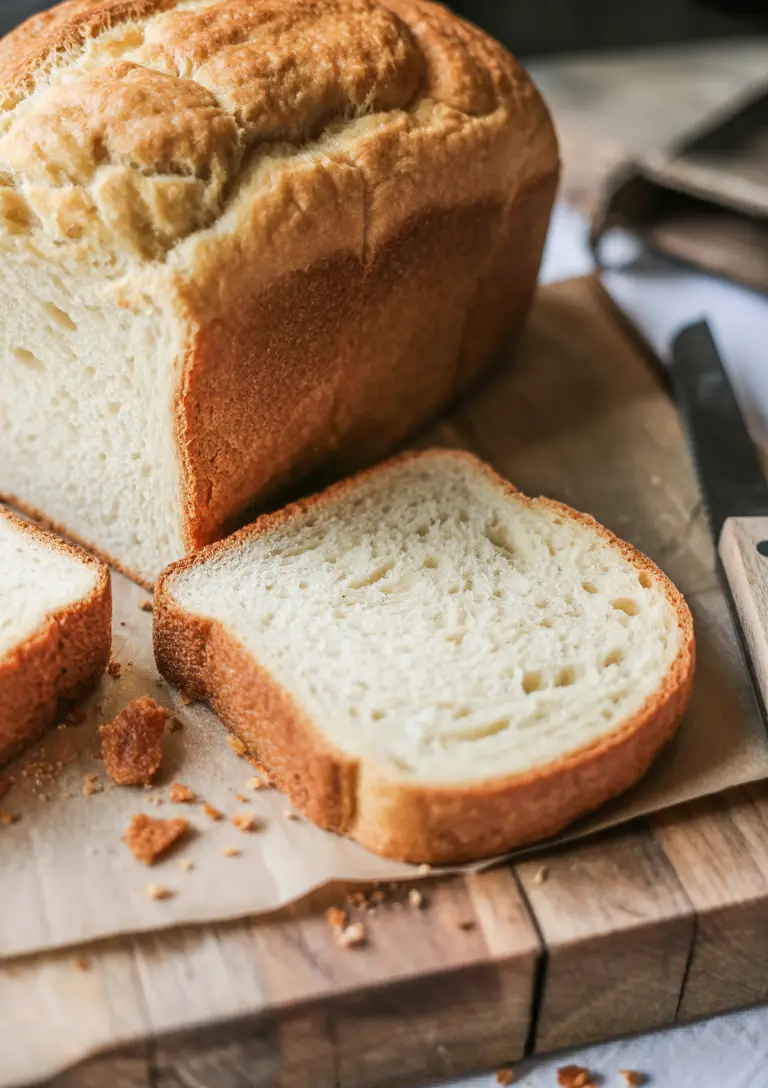
So, you want to bake bread.
But not like real bread. You know, the kind that needs yeast and a rising schedule and maybe an entire afternoon where you sit next to a dough ball whispering prayers at it. No no.
You want bread you can actually make. Without needing to Google “what is kneading?” or worry about some bubbling sourdough starter living in your fridge for 3 years.
Well, you’re in the right place.
Because this Greek yogurt bread? It’s just five ingredients. No yeast. No kneading. No stress.
And the best part?
It tastes like you put in actual effort. Like the good kind of homemade that doesn’t taste like regret.
Let’s talk about how to make it.
Ok, but real quick—why this bread?
Because life happens. Some days you’re in the mood to attempt a baguette. Other days, you just want a loaf of something warm and crusty that’ll hold your peanut butter and make your kitchen smell like you know what you’re doing.
This bread is perfect for:
- The “what do I eat for breakfast that isn’t cereal” days
- Lazy soup nights when you need a dunkable friend
- Sandwiches, obviously
- Or just that random moment at 3PM when your brain says “bread. now.”
It’s super simple. And just weirdly satisfying to make.
Let’s get into it.
What You’ll Need (Ingredients)
Here’s what’s going in:
| Ingredient | Amount | Notes |
|---|---|---|
| All-purpose flour | 3 cups (360g) | You can sub 1 cup for whole wheat if you want |
| Baking powder | 1 ½ tablespoons | Make sure it’s not expired—yes, it matters |
| Salt | 1 ¼ teaspoons | Regular or sea salt works |
| Greek yogurt | 1 cup | Thick and plain—avoid flavored |
| Milk | 1 ½ cups | Dairy or non-dairy, both are fine |
That’s it. No weird ingredients. Nothing you can’t pronounce. And honestly, you probably already have most of this.
And if you don’t, I’ll show you a few swaps in a bit.
Now before we get to the how-to, here’s the thing…
Don’t treat this like a science project. This bread is forgiving. You don’t need a PhD in fermentation. You don’t even need perfect measuring skills. If your yogurt is a little over, or your flour’s a bit under, it’ll still work.
You’re just mixing stuff in a bowl. That’s the energy.
What You’ll Need (Tools)
Let’s talk gear. You don’t need a fancy mixer or a Dutch oven or one of those linen baskets that look like bread cribs.
Here’s the short list:
- A large mixing bowl
- A spoon or spatula (whichever one’s clean)
- Measuring cups + spoons
- A 9×5 loaf pan
- Parchment paper (optional but makes life easier)
- Wire rack or cutting board for cooling
If you’ve got a functioning oven and a pan that resembles a rectangle, you’re good to go.
Alright, so how do we actually make it?
Instructions
- Preheat your oven to 375°F (190°C). This gives it time to heat while you get your life together.
- Prep your pan. Spray it with nonstick spray or line it with parchment paper. (Parchment is easier for clean-up and also makes you feel like a pro.)
- Mix dry stuff. In a large bowl, add your flour, baking powder, and salt. Give it a quick stir so everything’s playing nice.
- Add the wet ingredients. Pour in the yogurt and milk. Then stir. It’s going to look a little sticky and shaggy. That’s exactly what we want.
- Transfer to your pan. Scrape the dough into the loaf pan and smooth the top with your spatula. It doesn’t have to look perfect—it’s rustic, ok?
- Bake for 55–60 minutes. The top should be golden brown and feel firm when tapped. A toothpick should come out mostly clean with a few crumbs.
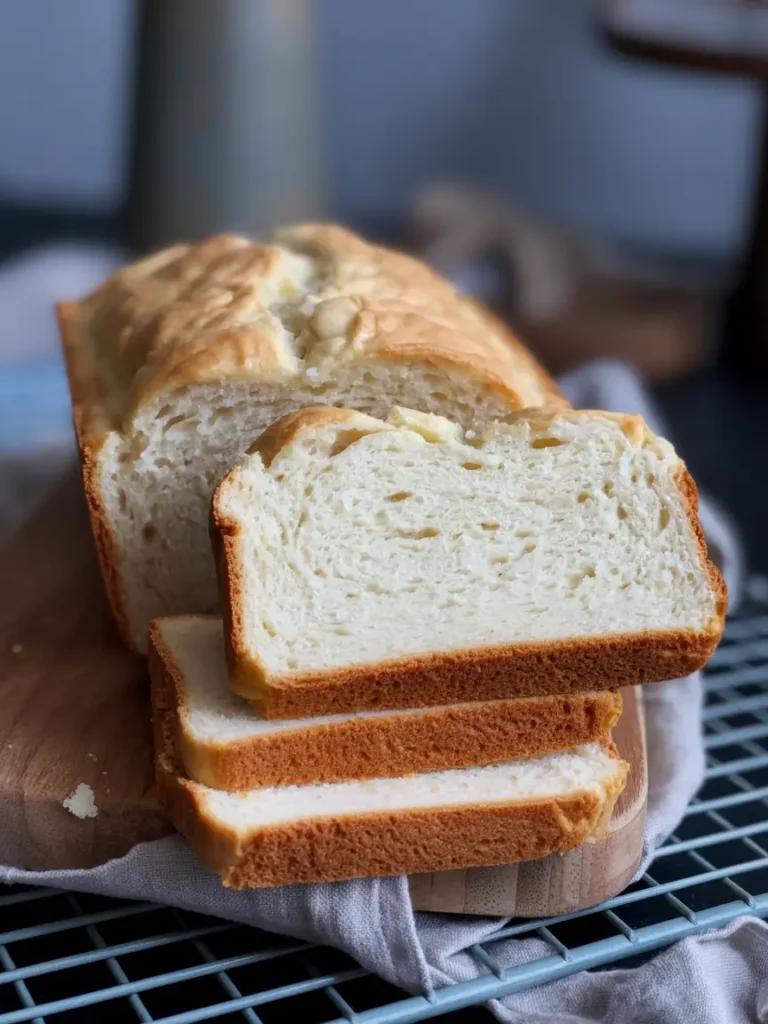
- Cool it. Let it hang out in the pan for 5–10 minutes, then lift it out and let it fully cool on a rack. You can slice while warm, but it holds better once cooled.
That’s it. That’s the whole thing. Bread = made.
Substitutions & Variations (Because Flexibility is Queen)
Here’s where it gets fun. If you’re the kind of person who likes to make a recipe and then immediately change it, I got you.
| Ingredient | Swap Ideas | Notes |
|---|---|---|
| Flour | Whole wheat (1 cup max), GF blend | Too much WW flour = dense. GF needs 1:1 baking blend |
| Yogurt | Sour cream or quark | Needs to be thick and unsweetened |
| Milk | Almond, oat, soy, even canned coconut | Avoid flavored ones unless you’re going sweet |
| Add-ins | Herbs, cheese, olives, garlic, cinnamon | Start with ½ cup of add-ins. Don’t go wild |
Some variations I’ve tried:
- Chopped rosemary + cheddar = savory heaven
- Swirl of cinnamon + honey = breakfast vibes
- Grated zucchini + garlic = weirdly good
If you discover a combo that slaps, come back and tell me. Sharing is caring.
Make-Ahead Tips (Optional, but Super Handy)
You can definitely prep some of this ahead if your mornings are chaos (same).
- Mix dry ingredients in advance. Store in a container so all you have to do is add wet stuff and bake.
- Freeze a baked loaf. Let it cool completely, wrap it in foil, then stash it in a freezer bag. Thaw overnight in the fridge, reheat at 300°F.
Bonus tip: Slice it before freezing so you can grab one or two pieces when needed.
Pro Tips (Because You Deserve to Nail This)
- Check your baking powder. If it’s older than a year or smells weird, replace it. Old powder = sad bread.
- Use thick yogurt. If yours is watery, strain it a little. Thin yogurt = soupy dough.
- Don’t overmix. This is a quick bread, not a workout. Stir just until combined.
- Foil trick: If the top browns too fast, lightly cover with foil around the 40-minute mark.
- Cool completely. Or at least try. Cutting while hot gives you gummy slices.
Nutrition Breakdown (Approx. per slice, 10 slices total)
| Nutrient | Amount |
|---|---|
| Calories | 175 |
| Carbs | 28g |
| Protein | 7g |
| Fat | 3g |
| Fiber | 1g |
This is a general estimate, but it’s a decent option for a balanced snack or base for a meal.
What Goes With It?
You can eat this on its own. You absolutely will. But if you want to turn it into a moment, here’s what works:
For Breakfast:
- Topped with peanut butter and banana
- Toasted with cream cheese and jam
For Lunch:
- Turkey + arugula sandwich
- Grilled cheese with tomato soup
For Dinner:
- Side of stew or chili
- Dip in lentil soup or minestrone
For Snack:
- Olive oil + balsamic drizzle
- Sliced + toasted with garlic butter
Basically, if it holds up to a spread or a dunk, it’ll love this bread.
Leftovers & Storage
Room temp: Wrap in foil or store in an airtight container for up to 4 days.
Fridge: You can keep it there, but it dries out a little faster. If you do, toast before eating.
Freezer: Slice, layer with parchment, freeze. Reheat in toaster or oven.
To refresh: Toast it. That’s the best way to bring it back to life. Or microwave for 10–15 seconds.
FAQs
Can I make this vegan?
Yes—just use a plant-based yogurt and milk. Make sure the yogurt is thick enough. Soy-based works best.
Can I use self-rising flour?
You can, but skip the baking powder and reduce salt slightly. Watch bake time—it may be quicker.
Can I double the recipe?
Yes! Bake in two loaf pans or a 9×13 pan and cut into squares. Just adjust bake time accordingly.
Why is my bread gummy?
Two possibilities: underbaked (leave it in longer next time) or sliced too soon (give it that cooling time).
Can I use flavored yogurt?
You can, but it’ll be sweet. Works well if you want a sweeter loaf—just reduce added sugar elsewhere.
Wrap Up
You made it this far, so clearly you’re thinking about making this. And if you are? Just do it.
This is that kind of recipe that earns you the title of “person who bakes” without any of the baggage. No starter to feed, no flour on the ceiling, no panic. Just a cozy loaf that works every time.
It’s simple. It’s satisfying. And it’s ridiculously good.
If you try it, come back and let me know how it went. Did you go savory? Sweet? Did you eat half the loaf standing over your sink? (Respect.)
Seriously—your feedback, questions, random thoughts—I want to hear them. Drop a comment and tell me what you did. You might inspire someone else to finally give it a go too.
Happy baking. You’ve got this.