Those bananas on your counter are staring at you, aren’t they? I know the look. They’re past the point of being a good snack, all spotty and a little too soft. You feel guilty just thinking about tossing them.
Well, I’ve got you. Today, we’re turning that banana guilt into one of the easiest, most satisfying treats you’ll ever make. Seriously.
This isn’t your grandma’s complicated, ten-ingredient banana bread. This is a 4-ingredient, flourless, ridiculously simple recipe. It’s the kind of thing you whip up on a Tuesday night when you need something sweet but don’t want a sink full of dishes. It’s just so good.
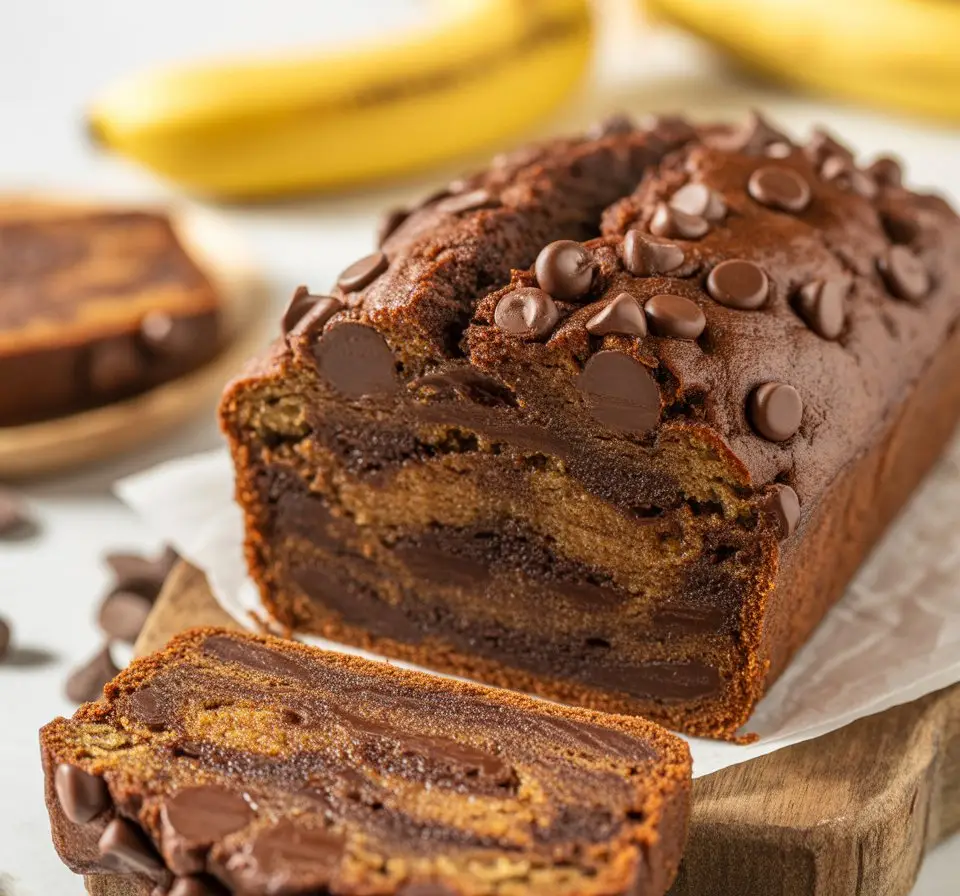
Because it’s flourless, the texture is different. It’s dense, moist, and almost fudgy. It’s what happens when a brownie and banana bread decide to have a very delicious baby. And it comes together so fast you’ll wonder why you haven’t been making it your whole life.
What You’ll Need
Yeah, that’s really it. Four things. It feels like cheating, but I promise it’s not.
- Overripe Bananas: And I mean OVERRIPE. We’re talking more black than yellow. This is where all the natural sweetness and moisture comes from. Don’t you dare use firm, yellow-green bananas for this.
- Creamy Peanut Butter: This acts as the binder and adds fat and protein. The “drippy” natural kind is your best friend here, the kind where the oil separates. It mixes in so much better.
- Eggs: These give the bread structure and lift. Without them, you’d just have a pan of hot banana-peanut goo. Which might still be good, but it’s not banana bread.
- Chocolate Chips: Because… chocolate. Is an explanation really needed? Use whatever kind you love. Semi-sweet, dark, milk chocolate, or even a chopped-up chocolate bar.
Tools Required
No fancy equipment needed. You probably have all this stuff already.
- A 9×5 inch loaf pan
- Parchment paper
- One large mixing bowl
- A fork (for mashing)
- A spatula (for mixing and scraping)
- Measuring cups
How to Make Flourless Banana Bread
This is so simple, you could do it with your eyes closed. Please don’t, though. Ovens are hot.
Step 1: First things first, preheat your oven to 350°F (175°C). Then, line your loaf pan with parchment paper, leaving some overhang on the sides. This will act as a little handle to lift the bread out later. Trust me, it’s a game-changer.
Step 2: In your large bowl, add the overripe bananas. Now get to mashing. Use a fork and really go for it. You want it to be a smooth, soupy puree with very few lumps. This is your workout for the day.
Step 3: Add the peanut butter and the two eggs directly into the banana puree. Mix everything together with a spatula until it’s just combined. It might look a little weird and separated at first, but keep going until it’s a smooth, consistent batter. Don’t go crazy and overmix it, though.
Step 4: Gently fold in your chocolate chips. Save a small handful to sprinkle on top before baking. This is purely for aesthetics, but a pretty banana bread just tastes better, right?
Step 5: Pour the batter into your prepared loaf pan and spread it out evenly with your spatula. Sprinkle those remaining chocolate chips over the top.
Step 6: Bake for 30-40 minutes. You’ll know it’s done when a toothpick inserted into the center comes out clean (a little melted chocolate is fine, but no wet batter). The top should be golden brown and set.
Step 7: This is the HARDEST part. You have to let it cool completely in the pan on a wire rack. I’m serious. A flourless bread needs this time to set up. If you try to slice it warm, it will fall into a crumbly, delicious mess. Patience!
Pro Tips
I’ve made this more times than I can count, and I’ve learned a few things. Here are my secrets.
- The Banana Situation is CRITICAL. I said it before, but I’ll say it again. Use ugly, black, mushy bananas. They are sweeter, which means you don’t need any other sugar. They also have more moisture, which is essential for that fudgy texture. If your bananas are just yellow with a few brown spots, wait a few more days.
- Peanut Butter Choice Matters. Use a creamy, natural-style peanut butter. The kind that you have to stir. The thick, hydrogenated, no-stir brands (like Jif or Skippy) have a different consistency and can make the bread drier and more crumbly.
- Don’t Guess The Doneness. Flourless baked goods are tricky. They can look done on the outside but still be a gooey mess inside. The toothpick test is non-negotiable. Check it at the 30-minute mark, and don’t be afraid to give it another 5-10 minutes if it needs it. An underbaked loaf is a sad, mushy loaf.
- The Cooling Period is NOT a Suggestion. I know, the house smells amazing and you want a warm slice. Resist the urge. This bread firms up as it cools. Slicing it hot will lead to a structural collapse. Let it cool in the pan for at least 30 minutes, then use the parchment paper handles to lift it out and let it cool completely on a wire rack for another hour or so. Your patience will be rewarded with clean, perfect slices.
Substitutions and Variations
This recipe is super forgiving. Feel free to play around with it!
| Ingredient | Substitution | Notes |
|---|---|---|
| Creamy Peanut Butter | Almond Butter, Cashew Butter | Any natural nut butter works great. |
| Creamy Peanut Butter | Sunflower Seed Butter, Tahini | For a nut-free version. The flavor will change, obviously. |
| Chocolate Chips | Chopped Nuts (walnuts, pecans) | Adds a great crunch. |
| Chocolate Chips | White chocolate or butterscotch chips | Makes it extra sweet and decadent. |
| Add-in | 1 tsp Vanilla Extract | Adds a little warmth and depth. |
| Add-in | 1/2 tsp Cinnamon | Gives it a classic banana bread spice. |
Diet Swaps & Meal Pairings
Want to fit this into a specific eating style? It’s pretty easy.
| Diet | How to Adapt |
|---|---|
| Dairy-Free | Use dairy-free chocolate chips. The base recipe is already dairy-free! |
| Gluten-Free | Good news! This recipe is naturally gluten-free since there’s no flour. |
| Nut-Free | Swap the peanut butter for sunflower seed butter and ensure your chocolate chips are nut-free. |
As for how to eat it, a slice is amazing on its own. It’s also incredible slightly warmed in the microwave with a smear of butter or a drizzle of honey. I love having a piece with my morning coffee; it feels like a super indulgent breakfast.
Tips for Leftovers and Storage
If you somehow have any left, here’s how to keep it fresh.
On the Counter: You can store it in an airtight container at room temperature for up to 2 days. Because it’s so moist, it won’t last much longer than that.
In the Fridge: To make it last longer, store it in an airtight container in the refrigerator for up to a week. It will be firmer from the cold, so you might want to let it sit out for a bit or microwave a slice for 10 seconds.
In the Freezer: This bread freezes beautifully! You can freeze the whole loaf or, my favorite method, pre-slice it. Wrap individual slices tightly in plastic wrap and then place them all in a freezer-safe bag. They’ll last for up to 3 months. You can pull out a slice whenever a craving hits!
Frequently Asked Questions
Q1. My bread was gummy and mushy in the middle. What did I do wrong?
Ans: This is the most common issue! It’s almost always one of two things: it was underbaked, or you didn’t let it cool completely before slicing. Be sure to do the toothpick test, and have the patience of a saint while it cools. It’s a different beast than traditional bread.
Q2. Can I use crunchy peanut butter?
Ans: You can, but it might slightly alter the texture. The creamy kind makes for a smoother, more cohesive batter. If you love the texture of nuts, I’d suggest using creamy PB and just adding a handful of chopped peanuts to the batter instead.
Q3. Can I make this without eggs?
Ans: I’ve had some readers try it with “flax eggs” (ground flaxseed mixed with water) with okay results, but the texture is much denser and more prone to crumbling. The eggs provide a lot of the structure here, so I’d stick with them if you can for the best result.
Q4. It’s not sweet enough for me. Can I add sugar?
Ans: The sweetness really depends on your bananas. If you use super-ripe bananas and it’s still not enough, you could add a tablespoon or two of maple syrup or honey to the batter. Just be aware it will make the batter a bit runnier and might slightly increase the bake time.
Wrapping Up
So there you have it. A ridiculously simple, secretly healthier-ish banana bread that cleans out your fruit bowl and satisfies your sweet tooth. It’s proof that you don’t need a million ingredients or a ton of time to make something truly delicious.
Go ahead, give it a try. Rescue those sad bananas. I promise you won’t regret it.
And when you make it, I’d love to hear how it turned out for you! Did you try any fun variations? Drop a comment below and let me know. Any questions? Ask away!