Let’s be real for a second. The idea of a “healthy breakfast cookie” sounds a bit like a trap, doesn’t it?
It brings to mind something that tastes like dusty cardboard, sweetened with disappointment. We’ve all been there, trying to eat better in the morning and ending up with a sad, dry granola bar that leaves you hungry an hour later.
But what if I told you there’s a breakfast cookie that’s actually good? One that doesn’t just taste like a treat but is also packed with stuff that will keep you full and energized, without the sugar crash.
This isn’t a trick. It’s just a really smart way to start your day, especially when you’re rushing out the door. Think of it as your secret weapon against boring breakfasts.
What You’ll Need
Here’s the simple list of ingredients to make these happen. Nothing too crazy or hard to find, I promise.
- 2 large, very ripe bananas, mashed
- 1/2 cup creamy peanut butter (or another nut butter)
- 2 tablespoons maple syrup or honey
- 1 teaspoon vanilla extract
- 1 1/2 cups rolled oats (use gluten-free if needed)
- 1/4 cup chia seeds
- 1 teaspoon ground cinnamon
- 1/4 teaspoon salt
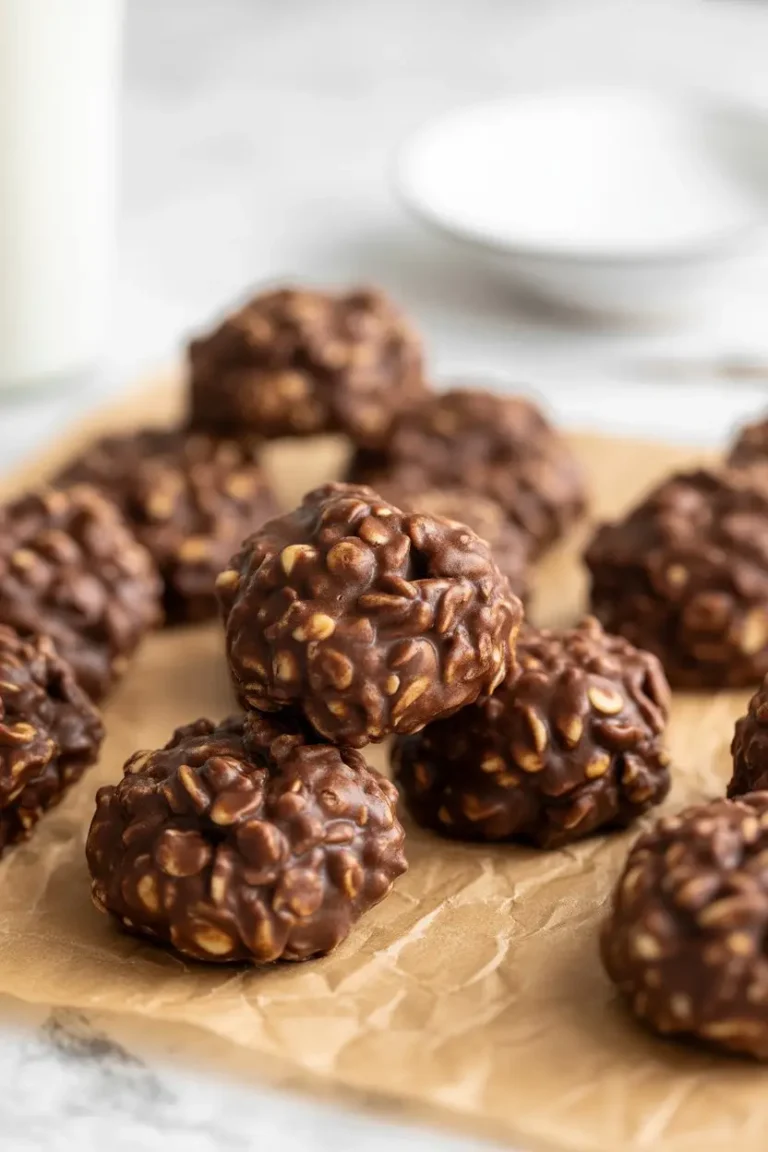
- 1/2 cup mix-ins of your choice (dark chocolate chips, chopped nuts, dried cranberries, etc.)
Tools Required
You probably have all of this stuff already, which is great. No need for any fancy gadgets.
- A large mixing bowl
- A smaller bowl (for dry ingredients)
- A fork or potato masher
- A spatula or wooden spoon
- Measuring cups and spoons
- A baking sheet
- Parchment paper
Step-by-Step Instructions
This is the easy part. It’s almost impossible to mess this up.
Step 1: First thing’s first, preheat your oven to 350°F (175°C). Line a baking sheet with parchment paper so nothing sticks. It makes cleanup a breeze.
Step 2: In your large bowl, get those ripe bananas and mash them up with a fork until they’re mostly smooth. A few lumps are totally fine; it adds character.
Step 3: Add the peanut butter, maple syrup, and vanilla extract to the mashed bananas. Mix it all together until it’s creamy and well combined.
Step 4: In the smaller bowl, whisk together the rolled oats, chia seeds, cinnamon, and salt. This just helps make sure the cinnamon and salt get evenly distributed.
Step 5: Pour the dry ingredients into the wet ingredients. Stir with a spatula until just combined. Don’t go crazy overmixing it.
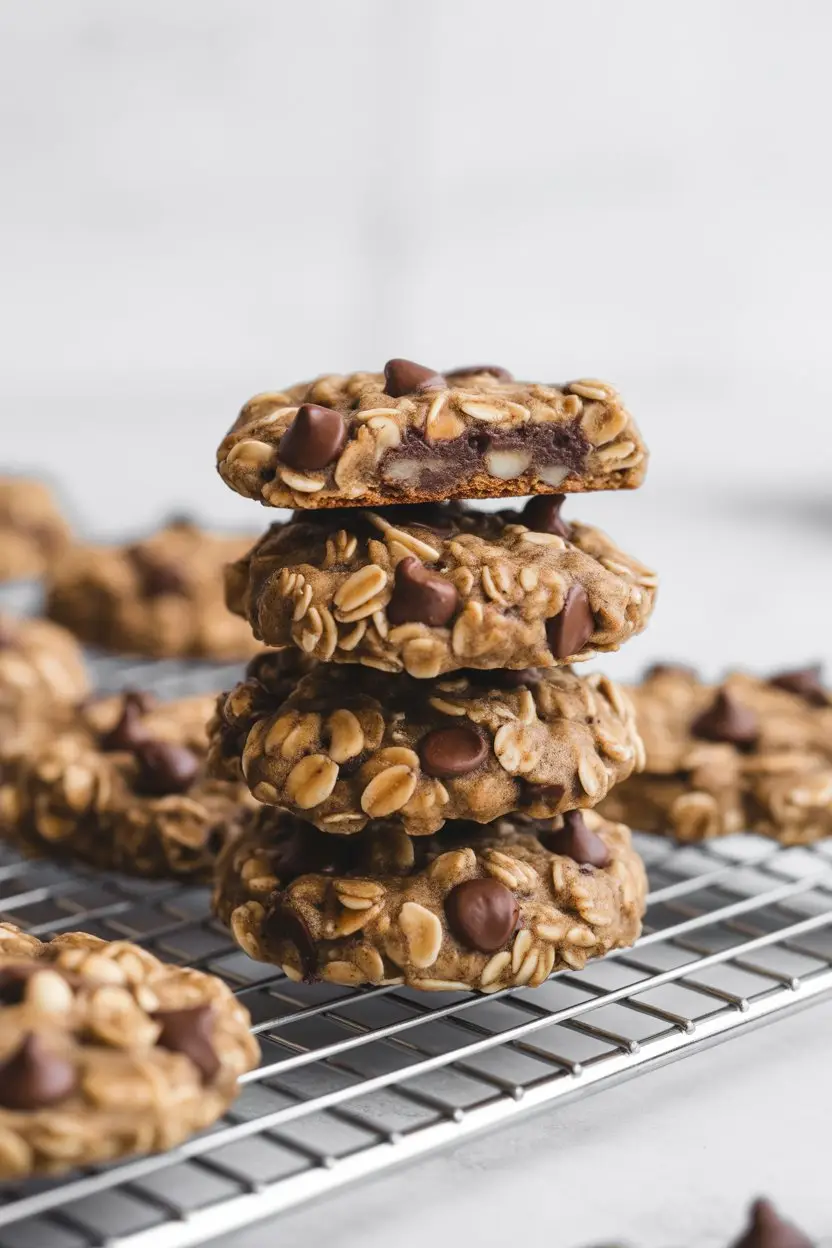
Step 6: Now for the fun part. Gently fold in your mix-ins, like chocolate chips or nuts.
Step 7: Scoop out rounded tablespoons of the dough onto your prepared baking sheet. These cookies won’t spread much, so gently press down on each one with your fingers or the back of a spoon to flatten them into a cookie shape.
Step 8: Bake for 13-15 minutes, or until the edges are golden brown and the centers are set.
Step 9: Let them cool on the baking sheet for a few minutes before moving them to a wire rack to cool completely. They’ll firm up as they cool down.
Pro Tips
After making these a dozen times (or maybe more, I lost count), I’ve picked up a few things that really help.
- Use Super Ripe Bananas: I’m talking about the ones with lots of brown spots. They are way sweeter, which means you get a better-tasting cookie without adding extra sugar. They’re also much easier to mash.
- Let the Dough Rest: This is a game-changer. After you mix everything together, let the dough sit for 10 minutes. This gives the oats and chia seeds time to absorb some of the moisture, which makes for a chewier, less crumbly cookie.
- Don’t Skip the Salt: It might seem like a tiny amount, but that quarter teaspoon of salt is super important. It balances out the sweetness from the bananas and maple syrup and makes all the other flavors pop.
- Toast Your Oats: If you have an extra five minutes, spread the rolled oats on a dry baking sheet and toast them in the oven for about 5 minutes before you start. It gives the cookies a fantastic nutty, deeper flavor.
Possible Substitutions and Variations
One of the best things about this recipe is how easy it is to change things up based on what you have or what you like.
For the peanut butter, you can substitute almond butter, cashew butter, or sun butter. Sun butter is especially great if you need a nut-free option. Instead of maple syrup, you can use honey or agave nectar, though keep in mind that honey isn’t vegan if that matters to you.
If you don’t have rolled oats, quick oats will work just fine, though they’ll give you a slightly softer texture. Chia seeds can be swapped out for ground flax seeds, which work just as well for binding. And when it comes to chocolate chips, feel free to get creative with raisins, dried cherries, seeds, or whatever mix-ins you love.
Meal Pairing Suggestions
While these are a meal in themselves, sometimes you want a little something extra.
Greek yogurt makes an excellent companion, adding a nice boost of protein and a creamy tang that balances the sweetness of the cookies. A glass of milk is classic for a reason, whether you go with dairy or plant-based options. Adding a piece of fresh fruit like an apple or orange gives you extra vitamins and a bright contrast to the rich cookies. And of course, a cup of coffee or tea is the perfect morning companion for these treats.
Tips for Efficiency
Mash Smart: Use a potato masher instead of a fork for the bananas. It’s way faster and more effective.
One Bowl Method: You can technically skip using a second bowl for the dry ingredients. Just add them directly to the wet mixture and stir carefully to make sure everything gets mixed in. Fewer dishes to wash is always a win.
Make-Ahead and Storage
These cookies are perfect for meal prep. You can easily make a batch on Sunday to have ready for the whole week.
Make-Ahead: You can prepare the cookie dough, cover it, and store it in the refrigerator for up to 2 days before baking.
Leftovers and Storage: Store the cooled cookies in an airtight container. At room temperature, they’ll stay fresh for up to 3 days. In the refrigerator, they will last for about a week. For longer storage, these freeze beautifully. Place them in a single layer on a baking sheet to freeze, then transfer them to a freezer-safe bag or container. They’ll keep for up to 3 months. Just pull one out and let it thaw for a few minutes before eating.
Frequently Asked Questions
Here are some common questions that might pop up.
Q1. Can I make these without any added sweetener? Ans: Yes, you definitely can. If your bananas are very ripe, they provide a lot of natural sweetness. The cookies will just be less sweet overall, which some people actually prefer.
Q2. Why did my cookies turn out dry? Ans: This usually happens for two reasons. Either they were baked for too long, or your bananas were on the smaller side. If your dough seems too thick and dry, you can add a tablespoon of milk (any kind) or a little more mashed banana to get the right consistency.
Q3. Are these cookies gluten-free? Ans: They can be! Just make sure you use certified gluten-free rolled oats. Oats are naturally gluten-free, but they are often processed in facilities that also handle wheat, so cross-contamination can be an issue if you have a serious sensitivity or celiac disease.
Q4. Can I add protein powder to this recipe? Ans: You can, but you’ll need to make an adjustment. Add one scoop of your favorite protein powder, but also add 2-3 extra tablespoons of milk or water to the wet ingredients. Protein powder is very absorbent and will dry out the dough otherwise.
Wrapping Up
So there you have it. A breakfast cookie that isn’t lying to you. It’s simple, adaptable, and a genuinely delicious way to get your day started on the right foot without feeling like you’re missing out on anything.
It’s proof that eating healthy doesn’t have to be a punishment or a chore. Sometimes, it can be as easy as grabbing a cookie on your way out the door.
Now it’s your turn. Give this recipe a try and see what you think. I’d love to hear how it went for you in the comments below. What kind of mix-ins did you use? Any questions? Let me know