Some days you want a salad. And some days you want to dive face-first into a bowl of pure, unadulterated comfort. This is for those days.
I remember being a kid and thinking Sloppy Joes were the peak of culinary genius. Then I discovered mac and cheese and my world changed.
For years, they lived as two separate, beautiful things in my mind. Until one day, a little voice in my head whispered, “What if… you just… smooshed them together?”
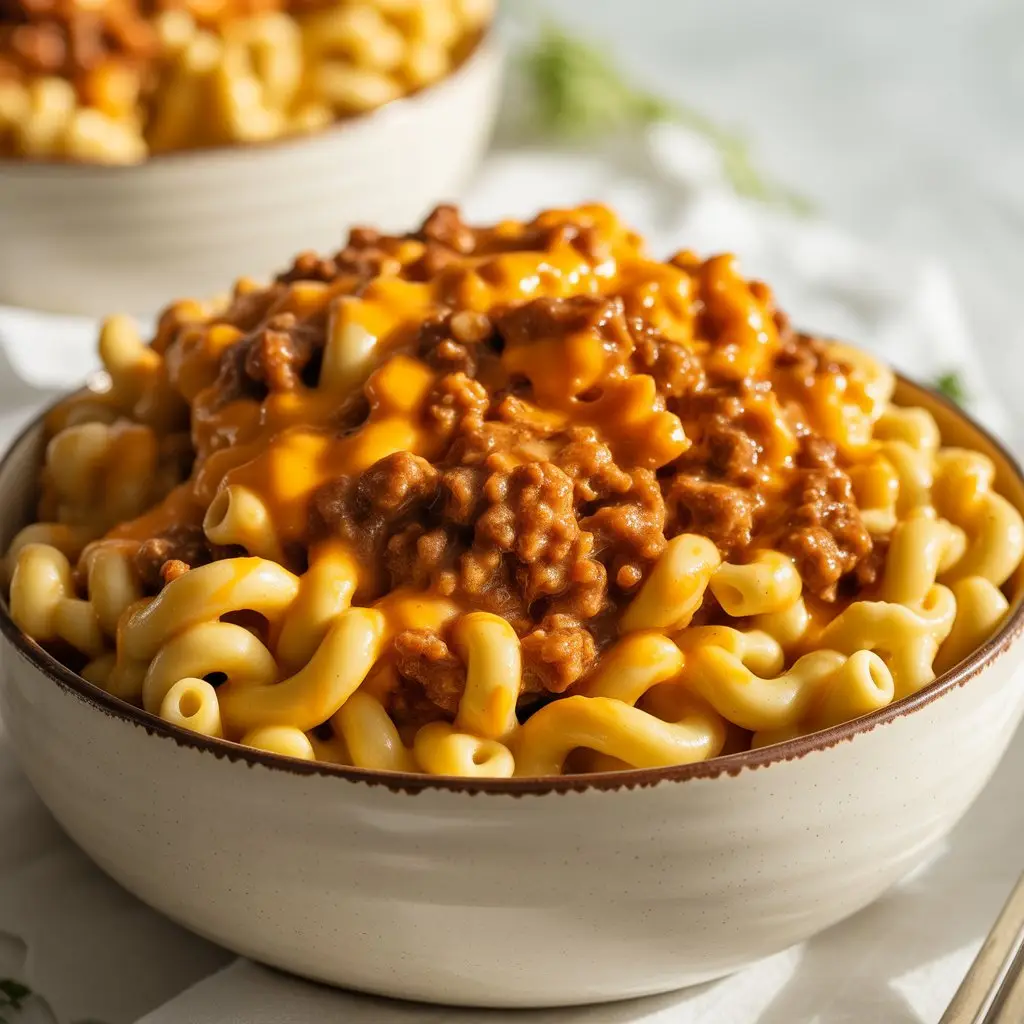
Friends, that little voice was a GENIUS. This isn’t just a recipe; it’s the answer to a question you didn’t even know you were asking. It’s meaty, it’s cheesy, it’s a little messy, and it’s absolutely amazing.
So let’s make something that’ll make your inner child do a happy dance.
What You’ll Need
Here’s the rundown of all the good stuff that goes into this masterpiece.
- 1 lb elbow macaroni (or shells, or rotini)
- 1 lb ground beef (80/20 is great)
- 1 small yellow onion, chopped
- 1 green bell pepper, chopped
- 2 cloves garlic, minced
- 1 cup ketchup
- 1/4 cup brown sugar, packed
- 2 tablespoons Worcestershire sauce
- 1 tablespoon yellow mustard
- Salt and black pepper, to taste
- 4 tablespoons unsalted butter
- 1/4 cup all-purpose flour
- 3 cups whole milk
- 1/2 teaspoon paprika
- 1/2 teaspoon garlic powder
- 4 cups sharp cheddar cheese, shredded (please shred your own!)
Tools You’ll Actually Use
No weird, fancy gadgets needed. Just the basics.
- Large pot (for the pasta)
- Large skillet or Dutch oven
- Colander
- Whisk
- Wooden spoon or spatula
- Cheese grater
How to Make This Glorious Mess
Follow along, and I promise you won’t get lost. It’s easier than it looks.
Step 1: Get your pasta water boiling in the large pot. Salt it generously. Once it’s boiling, cook the macaroni according to the package directions, but pull it out a minute EARLY. It’s going to cook more later. Drain it and set it aside.
Step 2: While the pasta cooks, get your skillet or Dutch oven over medium-high heat. Add the ground beef and cook until it’s browned, breaking it up with your spoon. Drain off most of the grease, but leave a little bit for flavor.
Step 3: Add the chopped onion and bell pepper to the skillet with the beef. Cook for about 5-7 minutes, until they get soft and the onion looks kinda see-through.
Step 4: Stir in the minced garlic and cook for just one more minute until you can really smell it. Don’t let it burn, burnt garlic is a tragedy.
Step 5: Now for the “Sloppy” part. Pour in the ketchup, brown sugar, Worcestershire sauce, and mustard. Give it a good stir and bring it to a simmer. Let it bubble away for about 5 minutes to let all those flavors get to know each other. Season with a pinch of salt and pepper.
Step 6: Time for the “Mac and Cheese” part. In the now-empty pasta pot (or a separate saucepan), melt the butter over medium heat. Once it’s melted, whisk in the flour. Keep whisking for about a minute. It’ll look like a weird paste. This is your roux, and it’s what makes the sauce thick and creamy.
Step 7: Slowly, and I mean SLOWLY, start pouring in the milk while whisking like your life depends on it. This prevents lumps. Once all the milk is in, keep cooking and stirring until the sauce thickens enough to coat the back of your spoon (about 5-8 minutes).
Step 8: Turn the heat down to low. Add the paprika and garlic powder. Now, start adding the shredded cheddar cheese, one handful at a time, stirring until each batch is completely melted before adding the next. This is the secret to a smooth, not-greasy, cheese sauce.
Step 9: THE GRAND FINALE. Pour the beautiful, creamy cheese sauce over your cooked pasta. Stir gently. Then, pour the Sloppy Joe mixture into the pot with the mac and cheese. Fold it all together until everything is one big, happy, glorious family.
Step 10: Let it sit for about 5 minutes before serving. This is the hardest step, I know. But it lets the sauce thicken up just a tiny bit more. Serve it hot in a big bowl.
Pro Tips From My Kitchen Disasters
Learn from my mistakes so you can get it right the first time.
- Shred Your Own Cheese. I know, it’s an extra step. But the pre-shredded stuff has anti-caking powders that make your cheese sauce grainy. Trust me on this. It’s a game-changer for creaminess.
- Don’t Scorch the Sauce. When you’re making the cheese sauce, keep the heat on medium or medium-low. If the milk gets too hot, the cheese will separate and get oily. Be patient.
- Slightly Undercook the Pasta. I mentioned it above, but it’s SUPER important. The pasta will absorb some of the sauce as it sits, so if it’s already perfectly cooked, it’ll turn to mush. Aim for al dente, or even a little firmer.
Possible Substitutions and Variations
Don’t have something? Want to mix it up? I got you.
| Ingredient | Substitution | Notes |
|---|---|---|
| Ground Beef | Ground Turkey/Chicken | A leaner option. Works great. |
| Ground Beef | Brown Lentils | For a vegetarian version. |
| Sharp Cheddar | Gouda, Monterey Jack | Use any good melting cheese. |
| Elbow Macaroni | Shells, Rotini, Penne | Anything with ridges to hold sauce. |
| Whole Milk | Evaporated Milk | Makes it even richer and creamier. |
Make it Spicy!
If you like a kick, add a pinch of cayenne pepper to the cheese sauce or a few dashes of your favorite hot sauce to the Sloppy Joe mix.
Make it Extra Veggie-ful
You can sneak in some finely chopped carrots or mushrooms with the onion and pepper. No one will ever know.
Meal Prep and Efficiency
You can totally make this easier on a busy night.
- Make Ahead: The Sloppy Joe mixture can be made up to 3 days in advance and stored in the fridge. Just reheat it before adding it to the mac and cheese.
- Time Saver: Start boiling your pasta water while you chop your veggies. Multitasking is your friend here.
- Diet Swaps: For a gluten-free version, just use your favorite gluten-free pasta. For a lower-carb take, serve the Sloppy Joe cheese sauce over steamed cauliflower or zucchini noodles.
Nutrition Info (Just an Estimate!)
This is a rough guide. Your ingredients and portion sizes will change things.
| Nutrient | Approx. Amount (per serving) |
|---|---|
| Calories | 650 kcal |
| Protein | 35g |
| Fat | 30g |
| Carbohydrates | 60g |
Leftovers and Storage
This stuff is almost better the next day. Almost.
Store any leftovers in an airtight container in the fridge for up to 4 days.
To reheat, the microwave works, but it can get a little dry. The best way is on the stovetop over low heat with a splash of milk to bring that creaminess back to life.
Frequently Asked Questions
Q1. My cheese sauce is gritty! What did I do wrong?
Ans: This usually happens for two reasons. Either the heat was too high when you added the cheese, causing it to break, or you used pre-shredded cheese with those powdery coatings. Next time, use lower heat and shred a block of cheese yourself!
Q2. Can I freeze this?
Ans: You can, but be warned, dairy-based sauces and pasta can get a little weird in the freezer. The texture of the pasta might be a bit softer when you thaw and reheat it. If you do freeze it, let it thaw in the fridge overnight before reheating.
Q3. The sauce seems thin. Will it thicken?
Ans: Yes! It will thicken up quite a bit as it cools and as the pasta absorbs some of the liquid. That 5-minute rest at the end is key. If it’s still way too thin, you can simmer it on low for a few more minutes, stirring gently.
Wrapping Up
So there you have it. A one-pot wonder that’s basically a hug in a bowl. It’s the perfect meal for a chilly night, a potluck, or just a Tuesday when you feel like you’ve earned it.
Don’t be afraid to make it your own. Throw in some bacon. Use a different cheese. That’s the fun of cooking.
Now go make it! And please, come back and leave a comment. I’d love to hear how it turned out for you or if you have any questions. Your kitchen stories make my day.