I have a soft spot for desserts that look like they took a ton of effort but are secretly the easiest thing in the world to make. It’s my favorite kind of magic trick.
You get to show up to the party or family dinner with this gorgeous, creamy dessert, and everyone thinks you’re some kind of baking wizard. Little do they know, your oven didn’t even get a chance to preheat.
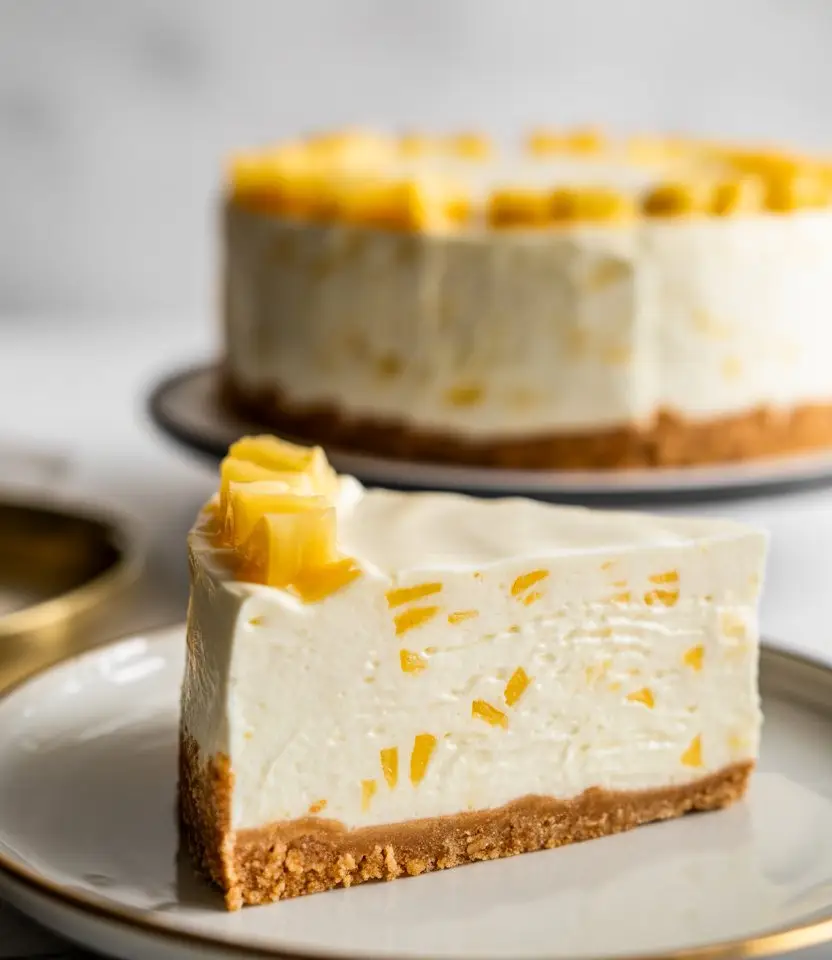
This No-Bake Pineapple Heaven Cheesecake is THAT dessert. It’s the one that saves the day when you need something impressive, fast, and without breaking a sweat. It’s a creamy, dreamy slice of tropical goodness that has honestly never let me down.
So, if you’re ready to become a dessert legend with minimal effort, you’ve come to the right place. Let’s get into it.
What You’ll Need
Before you panic, take a look at this list. It’s all simple stuff, most of which you can find at any grocery store. No weird, hard-to-find ingredients here, I promise.
- For the Crust:
- 2 cups graham cracker crumbs (about 14-15 full sheets)
- 1/2 cup unsalted butter, melted
- 1/4 cup granulated sugar
- For the Pineapple Cheesecake Filling:
- 16 ounces cream cheese, softened to room temperature (this is IMPORTANT)
- 1 can (20 ounces) crushed pineapple in juice, drained VERY well
- 1 can (14 ounces) sweetened condensed milk
- 1/4 cup lemon juice (fresh is best!)
- 1 teaspoon vanilla extract
- 1 package (3.4 ounces) instant vanilla pudding mix
- 1 cup heavy whipping cream
Tools Required
You don’t need a professional kitchen setup for this. Just a few basic things will get the job done perfectly.
| Tool | Purpose |
|---|---|
| 9-inch Springform Pan | Makes releasing the cake easy. |
| Electric Mixer | For a lump-free, creamy filling. |
| Mixing Bowls | One for the crust, one for the filling. |
| Spatula | For scraping the bowl and spreading. |
| Fine-Mesh Sieve | The secret to non-soggy cheesecake. |
How to Make This Pineapple Dream
Alright, here’s the play-by-play. Don’t overthink it. Just follow along, and you’ll be golden.
The Crust
Step 1: In a medium bowl, mix together your graham cracker crumbs, melted butter, and sugar. It should have the texture of wet sand. Don’t just stir it; get in there and make sure every crumb is coated.
Step 2: Press this mixture firmly and evenly into the bottom of your 9-inch springform pan. I use the bottom of a flat glass or measuring cup to pack it down nice and tight. This helps prevent a crumbly crust later.
Step 3: Pop that crust in the freezer for about 15-20 minutes to firm up while you make the filling. This is a non-negotiable step for a solid base.
The Filling
Step 4: DRAIN YOUR PINEAPPLE. I can’t say this enough. Put the crushed pineapple in a fine-mesh sieve and press down on it with a spoon or spatula. You want to get as much juice out as humanly possible. A watery filling is the enemy.
Step 5: In a large bowl, beat the softened cream cheese with an electric mixer until it’s completely smooth and creamy. Scrape down the sides of the bowl. No lumps allowed!
Step 6: Pour in the sweetened condensed milk and beat again until everything is combined and silky smooth. Then, add the lemon juice and vanilla extract and give it one more mix.
Step 7: Sprinkle the instant vanilla pudding mix over the cream cheese mixture. Beat on low speed at first (to avoid a pudding powder cloud in your kitchen) and then increase to medium until it’s fully incorporated and the mixture starts to thicken.
Step 8: In a separate, chilled bowl, whip the heavy cream until stiff peaks form. This means when you lift the beaters out, the cream stands up straight without flopping over. Be careful not to over-whip it into butter!
Step 9: Gently fold the whipped cream and the SUPER well-drained pineapple into the cream cheese mixture. Use a spatula and a gentle hand. You want to keep all that air you just whipped into the cream.
Putting It All Together
Step 10: Take your crust out of the freezer. Pour the glorious pineapple cheesecake filling over the crust and spread it into an even layer with your spatula.
Step 11: Cover the pan with plastic wrap and let it chill in the refrigerator for AT LEAST 6 hours. Honestly, overnight is even better. This time allows it to set up properly and for the flavors to meld together.
Step 12: When you’re ready to serve, run a thin knife around the edge of the pan before releasing the springform collar. This helps ensure a clean break. Slice, serve, and accept your compliments.
Pro Tips From My Kitchen
I’ve made this dessert more times than I can count, and I’ve learned a few things the hard way so you don’t have to.
Tip 1: Room Temp Cream Cheese is Key. I know I said it before, but it’s the most important rule. If your cream cheese is even a little bit cold, you will have a lumpy cheesecake. Leave it on the counter for a couple of hours. Trust me.
Tip 2: The Double Drain Method. For the pineapple, I drain it once in the can, then dump it into a sieve and press all the juice out. Then, I spread it on a couple of paper towels and blot it dry. It might seem like overkill, but it GUARANTEES your cheesecake sets up perfectly firm.
Tip 3: Chill Your Tools. Before you whip the heavy cream, stick your mixing bowl and the beaters from your mixer in the freezer for about 10-15 minutes. Cold tools help the cream whip up faster and create more stable peaks.
Tip 4: Get Clean Slices. For those perfect, photo-worthy slices, use a large, sharp knife. Dip the knife in hot water and wipe it clean between each and every cut. It’s a little extra work, but the results are so worth it.
Possible Substitutions and Variations
Want to mix things up? This recipe is pretty forgiving. Here are a few ideas that work great.
| Ingredient | Substitution Idea | Notes |
|---|---|---|
| Graham Crackers | Nilla Wafers, Golden Oreos, Shortbread | Adjust butter if cookies are very buttery. |
| Vanilla Pudding | Instant Cheesecake or Coconut Cream Pudding | Adds a different flavor twist. |
| Crushed Pineapple | Crushed Mango or Passion Fruit | Make sure it’s drained just as well! |
You can also add a 1/2 cup of toasted shredded coconut to the filling or the crust for an extra tropical punch. It’s SO good.
Make-Ahead Magic
This is the ultimate make-ahead dessert. You can make the entire cheesecake up to two days in advance. Just keep it covered in the fridge.
The flavors actually get better as it sits. The crust softens just a tiny bit, and the filling becomes even more flavorful. It’s a lifesaver for busy event prep.
Leftovers and Storage
If you somehow have leftovers, just cover the cheesecake tightly with plastic wrap directly on the surface to prevent a skin from forming. Or, if it’s still in the pan, cover the whole pan.
It will keep in the refrigerator for up to 4 days. I don’t recommend freezing the whole cheesecake, as the texture of the cream cheese can get a little weird and watery when it thaws. It’s best enjoyed fresh from the fridge.
Frequently Asked Questions
Q1. My cheesecake filling is runny! What went wrong?
Ans: This is almost always one of two things. First, you didn’t drain the pineapple enough. It releases a lot of liquid that can ruin the texture. Second, your cream cheese might not have been fully softened, or you didn’t beat it enough with the other ingredients to activate the pudding mix, which acts as a stabilizer.
Q2. Can I use fresh pineapple instead of canned?
Ans: I would stick to canned for this one. Fresh pineapple contains an enzyme called bromelain, which can break down dairy proteins and prevent your cheesecake from setting properly. The canning process deactivates this enzyme.
Q3. I don’t have a springform pan. What else can I use?
Ans: You can totally make this in a regular 9-inch deep-dish pie plate or an 8×8 or 9×9 square baking dish. You just won’t be able to remove the sides for that classic cheesecake look. You’ll have to scoop or cut it out of the dish, which tastes just as amazing.
Q4. How do I make this gluten-free?
Ans: Super easy! Just swap the graham crackers for your favorite gluten-free cookie crumbs. Many brands make excellent gluten-free graham-style crackers or vanilla cookies that would be perfect for the crust.
Wrapping Up
So there you have it. A dessert that’s ridiculously delicious, looks stunning, and requires zero oven time. It’s creamy, it’s packed with that sweet and tangy pineapple flavor, and it sits on a perfect buttery crust.
It’s the kind of recipe that becomes a go-to. The one people ask you to make again and again.
Give it a try! I’d genuinely love to hear how it turns out for you. Drop a comment below and let me know if you made any fun variations or if it was a huge hit at your get-together. I love hearing those stories!