Some days, the thought of making a complicated dinner feels like climbing a mountain. You’re tired, you’re hungry, and you just want something warm and comforting without a ton of effort.
I get it. I’ve had those days where I stare into the fridge like it holds the answers to the universe, only to close the door and feel even more lost.
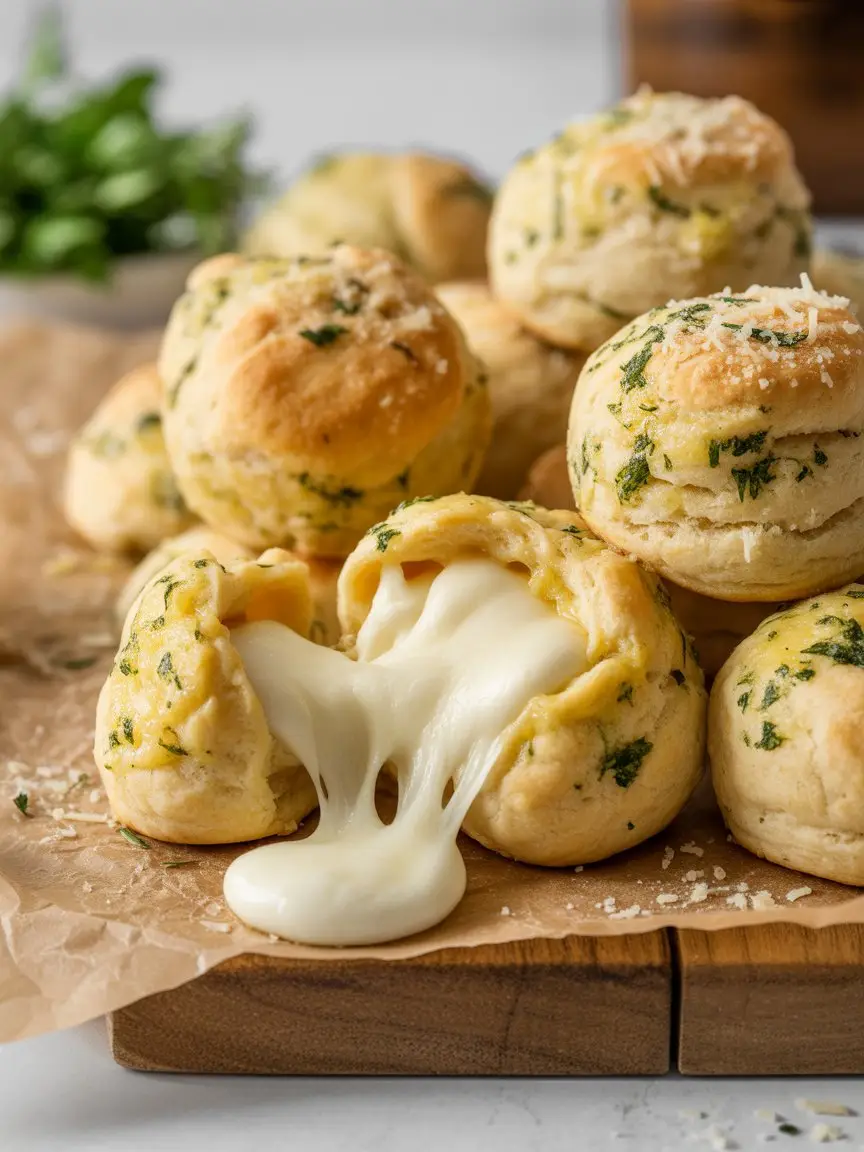
This recipe is for those days. This is your secret weapon. It’s a kitchen cheat code that turns a simple can of Pillsbury biscuits into something ridiculously delicious. We’re talking about cheesy, buttery, garlicky little pillows of happiness.
Seriously, they’re so good, you might just make them the main course. I’m not even kidding. Let’s get you set up to make something awesome.
What You’ll Need
The ingredient list is wonderfully short and simple. No need to go on a scavenger hunt at the grocery store for this one.
- 1 can (16.3 oz) Pillsbury Grands! Flaky Layers Biscuits
- 1/2 cup (1 stick) unsalted butter, melted
- 4-6 cloves garlic, minced (or 1.5 teaspoons of garlic powder)
- 1 cup shredded mozzarella cheese (about 4 oz)
- 2 tablespoons fresh parsley, chopped
- 1/2 teaspoon Italian seasoning
- A pinch of salt
- Optional: 1/4 cup grated Parmesan cheese for topping
Tools Required
You don’t need any fancy gadgets for this. Just your basic kitchen essentials will do the job perfectly.
- Baking sheet
- Parchment paper (makes cleanup a breeze!)
- Small bowl (for the garlic butter)
- Pastry brush or a small spoon
- Cutting board and knife
How to Make These Garlic Butter Bombs
Alright, let’s get down to business. This process is so quick, your oven will barely be preheated by the time you’re done assembling.
Step 1: First things first, get that oven preheating to 375°F (190°C). Line a baking sheet with parchment paper. This single step will save you from scrubbing a cheesy, buttery pan later. You’ll thank me.
Step 2: Pop open that can of biscuits. It’s still one of the most satisfying sounds in the kitchen, right? Separate the 8 biscuits and place them on your cutting board.
Step 3: Gently flatten each biscuit with your fingers until it’s about 3-4 inches wide. You’re not trying to make a pizza here, just creating a little nest for the cheese.
Step 4: Now for the fun part. Place a small pile of shredded mozzarella (about 2 tablespoons) into the center of each flattened biscuit. Don’t overfill, or you’ll have a cheese explosion in the oven (which, honestly, isn’t the worst problem to have).
Step 5: Carefully pull the edges of the biscuit dough up and over the cheese. Pinch the seams together firmly to seal it into a little ball. Make sure it’s sealed tight! Roll it gently in your hands to make it smooth.
Step 6: Place the sealed biscuit bombs, seam-side down, on your prepared baking sheet. Give them a little space to breathe and expand.
Step 7: In your small bowl, mix together the melted butter, minced garlic, chopped parsley, Italian seasoning, and a pinch of salt. Give it a good stir.
Step 8: Brush this glorious garlic butter mixture all over the tops and sides of each biscuit bomb. Be generous. This is where all the flavor magic happens. If you have any leftover butter, save it for after they bake.
Step 9: If you’re using it, sprinkle the grated Parmesan cheese over the top for an extra cheesy, crispy crust.
Step 10: Bake for 12-15 minutes, or until the tops are beautifully golden brown and the cheese is bubbly. When they come out of the oven, brush them with any remaining garlic butter. Serve them warm and watch them disappear.
Pro Tips
I’ve made these more times than I can count. Here are a few little tricks I’ve picked up along the way that make a real difference.
- Use Fresh Garlic if You Can. Garlic powder works in a pinch, but freshly minced garlic gives you a much more powerful and authentic flavor. It’s worth the tiny bit of extra effort.
- Don’t Skimp on the Sealing. The most common mistake is not pinching the seams shut tight enough. If you have a weak seal, the cheese will melt and leak out. Pinch it, then pinch it again. You want to trap all that gooey goodness inside.
- Room Temperature Cheese Works Best. If you let your shredded cheese sit out for 10-15 minutes before you start, it becomes a bit softer and easier to pack into the biscuit dough. It also melts more evenly.
- The Double Butter Brush. As mentioned in the steps, brushing the biscuits before they go in and right after they come out is key. The first brush bakes the flavor in, and the second one adds a final, glossy coat of deliciousness.
Substitutions and Variations
One of the best things about this recipe is how easy it is to change things up based on what you have or what you’re craving.
| Ingredient | Substitution/Variation | The Vibe |
|---|---|---|
| Mozzarella | Cheddar, Provolone, or a mix | Changes the cheese pull and flavor profile. |
| Pillsbury Grands! | Any canned biscuit dough | May need to adjust baking time for smaller biscuits. |
| Italian Seasoning | Just dried oregano or your favorite herbs | Customizes the herby notes. |
| The Filling | Add a mini pepperoni or cooked sausage | Turns it into a mini pizza bomb. |
Nutritional Breakdown and Diet Swaps
While these are definitely an indulgence, you can make a few tweaks to align them a bit better with certain dietary goals.
General Nutrition: Keep in mind, this is an estimate. Each biscuit bomb will be around 250-300 calories, depending heavily on the amount of butter and cheese you use. It’s a treat, so enjoy it as one!
- For a Lower-Carb-ish Option: Look for low-carb biscuit mixes or specific keto-friendly dough recipes online. The canned biscuit is the main source of carbs here.
- To Reduce Fat: You can try using a light butter spread, but honestly, real butter provides the best flavor and texture. A better approach might be to use slightly less butter and cheese per biscuit.
- For a Gluten-Free Version: Use your favorite gluten-free biscuit dough. You’ll need to follow the baking instructions on that specific package, as cooking times can vary.
Meal Pairing Suggestions
These garlic butter bombs are amazing on their own, but they also make the perfect sidekick to a ton of different meals.
| Pair It With | Why It Works |
|---|---|
| Spaghetti or Lasagna | The perfect tool for sopping up extra marinara sauce. |
| Tomato Soup or Chili | Dipping these into a warm bowl of soup is pure comfort. |
| A Big Salad | Balances out a light meal with something warm and satisfying. |
Make-Ahead Tips
If you want to get a head start, you absolutely can. You can assemble the biscuit bombs completely, place them on the baking sheet, cover them tightly with plastic wrap, and store them in the fridge for up to 4 hours before baking. Don’t brush them with the garlic butter until you’re ready to put them in the oven.
Leftovers and Storage
If by some miracle you have leftovers, they store pretty well. Let them cool completely, then place them in an airtight container in the refrigerator for up to 3 days.
To reheat, I highly recommend avoiding the microwave. It will make them soft and a bit soggy. Instead, pop them in an oven or toaster oven at 350°F for 5-7 minutes. They’ll get crispy and warm again, just like they were freshly baked.
Frequently Asked Questions
Q1. Can I make these in an air fryer?
Ans: Yes! And they are fantastic. Place them in the air fryer basket in a single layer, making sure they don’t touch. Cook at 330°F (165°C) for about 8-10 minutes, flipping halfway through, until golden brown.
Q2. My cheese all leaked out! What did I do wrong?
Ans: This usually comes down to two things: the seal wasn’t tight enough, or you put a little too much cheese inside. Really focus on pinching those seams together securely next time. A little leakage is fine, but if it’s a total blowout, the seal is the likely culprit.
Q3. Can I use homemade biscuit dough?
Ans: Of course! Homemade dough is amazing. Just be aware that your baking time and temperature might need to be adjusted based on your specific recipe. The beauty of the canned stuff is just the speed and consistency.
Q4. The bottoms of my biscuits are a little doughy but the tops are brown. What happened?
Ans: This can happen if your baking sheet is too thick or dark, or if your oven has uneven heat. Try moving the rack to the middle position. You can also try baking them for the first 10 minutes, then covering them loosely with foil for the last 5 minutes to prevent the tops from browning too quickly.
Wrapping Up
So there you have it. A super simple, ridiculously tasty recipe that can save a weeknight dinner or just satisfy a major craving for something cheesy and wonderful.
It’s proof that you don’t need a long list of ingredients or a ton of time to make something that feels special. It’s just good, honest, comfort food.
Now it’s your turn. Give these a try and let me know how they turn out! If you discover a cool new variation or have any questions, drop a comment below. I’d love to hear about it.


