I think we need to have a serious talk about Boston Cream Pie. Not the donut, though I respect its place in the world. I mean the actual cake.
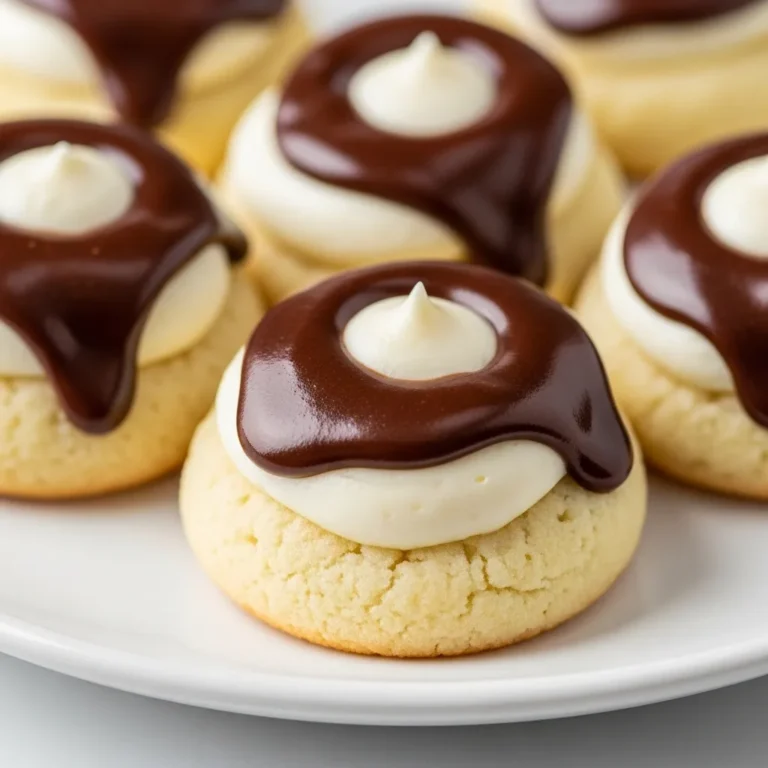
It sounds like pure luxury, right? A soft, tender vanilla cake. A rich, cool vanilla pastry cream. And a glossy, dark chocolate ganache draped over the top. It’s a classic for a reason.
But so many times, it’s just… a letdown. You get a slice from a bakery and the cake is dry, the cream is bland, and the chocolate tastes waxy. It’s a huge bummer.
I got so tired of that disappointment that I decided to just figure it out myself. And I discovered that making it in cupcake form is way easier and, honestly, way more fun.
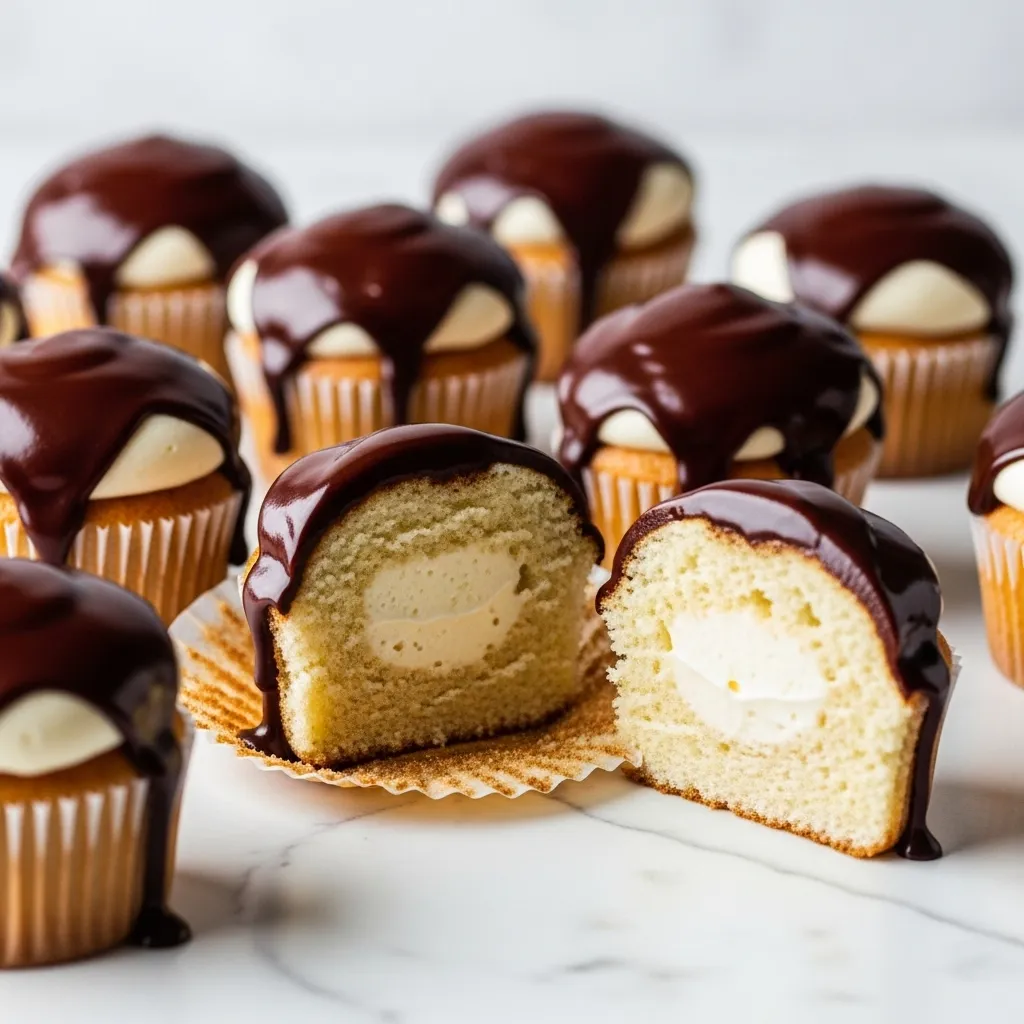
You get the perfect ratio of cake, cream, and chocolate in every single bite. No more fighting over the corner piece.
So let’s do this. Let’s make Boston Cream Cupcakes that are actually worth the effort and live up to the hype. Trust me, it’s not as scary as it sounds.
What You’ll Need
I’ve broken this down into the three main parts: the cake, the cream, and that glorious chocolate topping. It looks like a lot, but a lot of these are pantry staples.
For the Vanilla Cupcakes:
- 1 1/2 cups all-purpose flour
- 1 cup granulated sugar
- 1 1/2 teaspoons baking powder
- 1/2 teaspoon salt
- 1/2 cup unsalted butter, softened to room temperature
- 2 large eggs, at room temperature
- 1/2 cup buttermilk
- 2 teaspoons vanilla extract
For the Pastry Cream Filling:
- 1 1/2 cups whole milk
- 1/2 cup granulated sugar
- 1/4 cup cornstarch
- A pinch of salt
- 4 large egg yolks
- 2 tablespoons unsalted butter, cold
- 1 teaspoon vanilla extract
For the Chocolate Ganache:
- 4 ounces bittersweet or semi-sweet chocolate, finely chopped
- 1/2 cup heavy cream
Tools Required
Having the right gear makes everything smoother. Here’s what you’ll want to have on hand.
- Muffin tin
- Cupcake liners
- Stand mixer or hand mixer
- Medium saucepan
- Whisk
- Spatula
- Piping bag with a round tip (or a Ziploc bag)
- Apple corer or a small knife
- Mixing bowls
Pro Tips
I’ve made these a bunch of times and have definitely made a few mistakes along the way. Here are some things I learned so you don’t have to.
1. Don’t Scramble Your Eggs. When you make the pastry cream, you have to “temper” the eggs. This just means you add a little bit of the hot milk to the egg yolks while whisking like crazy. If you just dump the yolks into the hot milk, you’ll get sweet scrambled eggs. It’s a sad sight. Go slow, and you’ll be golden.
2. Patience with the Pastry Cream. Your pastry cream needs to be completely, 100% cold before you try to fill the cupcakes. I mean it. If it’s even a little bit warm, it will be runny and make your cupcakes soggy. I usually make mine the day before, or at least 4-5 hours ahead, and let it chill in the fridge.
3. The Apple Corer Trick. The easiest way to core the cupcakes for the filling is with an apple corer. Just press it into the center of the cupcake, pull it out, and you have a perfect little hole. If you don’t have one, a small paring knife works too, just be more careful.
4. Ganache Consistency is Key. For that perfect “drip” look, the temperature of your ganache matters. Let it cool for about 10-15 minutes after you make it. If it’s too hot, it will run right off the cupcakes. If it’s too cold, it will be too thick to pour. You want it to be like a slightly thinned-out syrup.
Step-by-Step Instructions
Okay, let’s break it down. We’ll start with the part that needs to cool first.
Part 1: Make the Pastry Cream (Do this first!)
Step 1: In a medium saucepan, heat the whole milk over medium heat until it’s just simmering around the edges. Don’t let it come to a full boil.
Step 2: While the milk is heating, whisk the sugar, cornstarch, and salt together in a separate bowl. Then, whisk in the egg yolks until the mixture is pale yellow and smooth.
Step 3: Time to temper! Slowly pour about half a cup of the hot milk into the egg yolk mixture while whisking constantly. This warms the eggs up gently.
Step 4: Now, pour the warmed egg mixture back into the saucepan with the rest of the milk. Put it back on medium heat.
Step 5: Whisk constantly and continuously. The mixture will start to thicken. It usually takes about 2-4 minutes. Once it’s thick like pudding, remove it from the heat.
Step 6: Immediately stir in the cold butter and vanilla extract until everything is smooth. Pour the cream into a clean bowl.
Step 7: Cover the cream with plastic wrap, pressing the wrap directly onto the surface of the cream. This prevents a skin from forming. Chill in the refrigerator for at least 4 hours, but preferably overnight.
Part 2: Bake the Vanilla Cupcakes
Step 1: Preheat your oven to 350°F (175°C) and line a muffin tin with cupcake liners.
Step 2: In a large bowl, whisk together the flour, sugar, baking powder, and salt.
Step 3: Add the softened butter to the dry ingredients and mix on low speed until the mixture looks like wet sand.
Step 4: In a separate small bowl, whisk together the eggs, buttermilk, and vanilla extract.
Step 5: Pour the wet ingredients into the dry ingredients and mix on medium speed until just combined. Don’t overmix! Scrape down the sides of the bowl to make sure it’s all incorporated.
Step 6: Fill your cupcake liners about two-thirds full.
Step 7: Bake for 18-22 minutes, or until a toothpick inserted into the center comes out clean. Let them cool in the pan for a few minutes before moving them to a wire rack to cool completely.
Part 3: Assemble and Finish
Step 1: Once the cupcakes are completely cool, use an apple corer or a small knife to remove the center from each cupcake. Don’t go all the way to the bottom. (You can snack on the little cake plugs, I won’t tell.)
Step 2: Give your chilled pastry cream a good stir to loosen it up. Transfer it to a piping bag (or a Ziploc bag with the corner snipped off).
Step 3: Pipe the pastry cream into the hole in each cupcake, filling it to the top.
Step 4: Make the ganache. Place your finely chopped chocolate in a heat-proof bowl. Heat the heavy cream in a small saucepan until it’s just simmering. Pour the hot cream over the chocolate and let it sit for 5 minutes without stirring.
Step 5: After 5 minutes, whisk the mixture gently until it’s completely smooth and glossy. Let it cool for about 10-15 minutes to thicken slightly.
Step 6: Spoon or pour the ganache over the top of each filled cupcake, letting it drip down the sides a little. Let the cupcakes sit for about 20-30 minutes for the ganache to set before serving.
Nutritional Info and Healthy Swaps
Look, these are cupcakes. They’re a treat. But it’s still good to know what’s in them.
| Nutrient | Approximate Amount (per cupcake) |
|---|---|
| Calories | 320 kcal |
| Protein | 5 g |
| Fat | 18 g |
| Carbohydrates | 35 g |
Possible Substitutions and Variations
Want to mix things up? I get it. Here are a few ideas.
| To Make It | Swap This | For This |
|---|---|---|
| Gluten-Free | All-purpose flour | A good 1-to-1 gluten-free baking flour blend. |
| Dairy-Free | Butter, milk, buttermilk, heavy cream | Vegan butter, almond/soy milk, full-fat coconut milk for cream. |
| Mocha-Flavored | Nothing (it’s an addition) | Add 1 tsp of instant espresso powder to the hot cream for the ganache. |
Make-Ahead & Time-Saving Tips
This recipe has a few parts, so planning ahead is a game-changer. It makes the whole process feel way less chaotic.
Pastry Cream: You can make the pastry cream up to 2 days in advance. Just keep it in an airtight container in the fridge with the plastic wrap on the surface.
Cupcakes: The cupcakes can be baked one day ahead. Store them in an airtight container at room temperature once they are completely cool.
Assembly: It’s best to fill and glaze the cupcakes the day you plan to serve them for the best texture.
Leftovers and Storage
If you somehow have leftovers, you need to store them properly because of the dairy in the filling.
Place the finished cupcakes in an airtight container. They need to be stored in the refrigerator. They will stay good for up to 3 days.
A little heads up: the cake might be a bit firm straight from the fridge. I like to let them sit out on the counter for about 15-20 minutes before eating to let the cake soften up a bit.
Frequently Asked Questions
Q1. My pastry cream is runny! What did I do wrong?
Ans: This usually happens for two reasons. Either it wasn’t cooked long enough on the stove to fully thicken, or it wasn’t chilled for long enough. Make sure you cook it until it’s noticeably thick, and give it at least 4 hours in the fridge.
Q2. Can I use a boxed cake mix for the cupcakes to save time?
Ans: Absolutely. I am not a baking purist. Use a good quality vanilla or yellow cake mix. To make it taste more homemade, try swapping the water called for on the box with buttermilk and the oil with melted butter.
Q3. My ganache seized up and got grainy. Can I fix it?
Ans: Yes! This happens if a little bit of water gets in or if it’s overheated. Try adding a tablespoon of very hot cream or milk and whisking vigorously. It can often bring it back to a smooth consistency.
Q4. Do I really need a piping bag?
Ans: Nope. A heavy-duty Ziploc-style plastic bag works great. Just fill the bag with the cream, push it down to one corner, and snip a small piece of the corner off. It works just as well for filling the cupcakes.
Wrapping Up
There you have it. Boston Cream Pie, but better. In a cute, personal-sized portion that delivers on every promise of flavor and texture.
This recipe might seem like it has a lot of steps, but each part is simple on its own. It’s a really rewarding bake, and people are always so impressed when you bring these out.
So give it a try. Take your time, enjoy the process, and I promise you’ll have some seriously amazing cupcakes to show for it.
If you make them, I’d love to hear how it went! Drop a comment below and tell me about your experience or ask any questions you have.