Sometimes you get a craving that just won’t quit. You know the one.
It’s that little voice that says you deserve an entire Boston Cream Pie. But then the other, more tired voice, chimes in and reminds you that making a whole pie is, well, a whole thing.
It involves layers, and a lot of waiting, and way more dishes than I ever want to do on a Tuesday night.
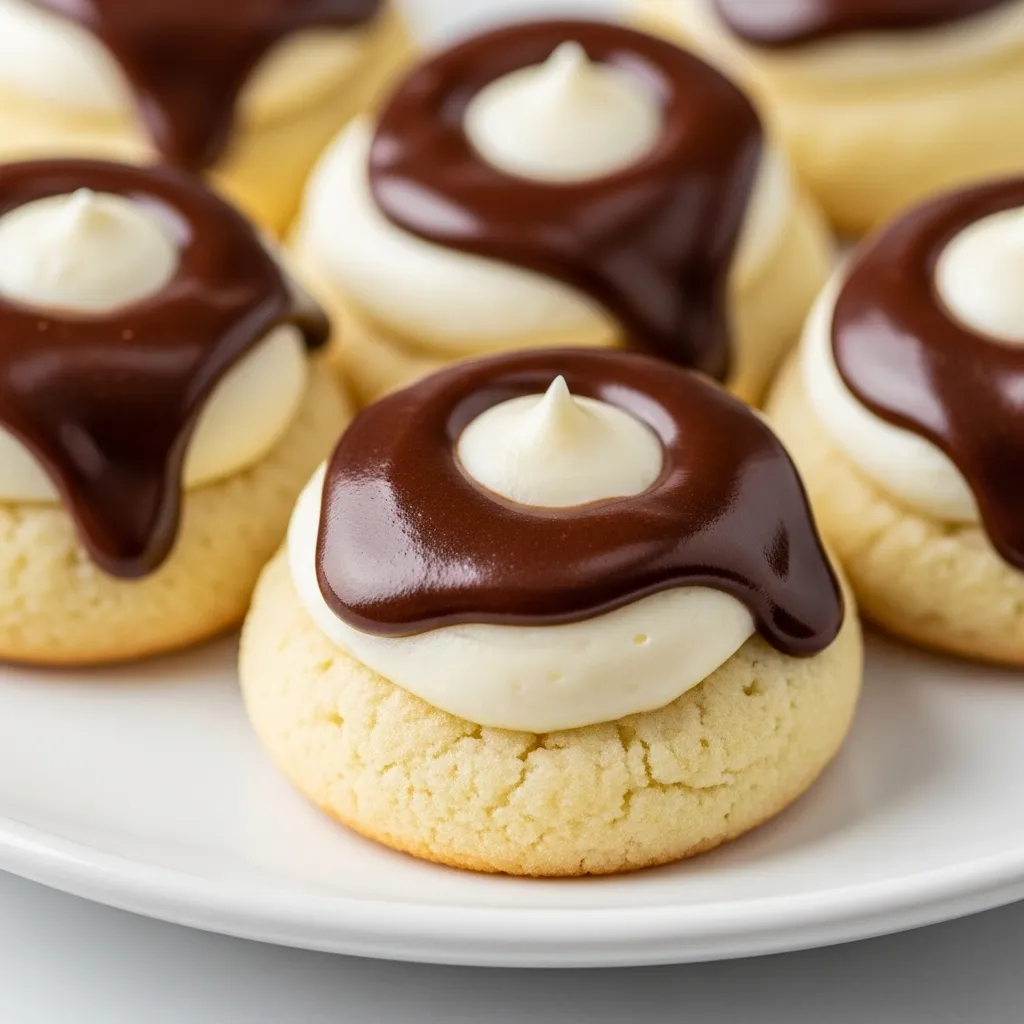
So, what if you could get all that deliciousness—the soft cakey base, the creamy vanilla filling, the rich chocolate top—but in a cute, bite-sized cookie?
Yeah, I thought that might get your attention. This is the answer. The perfect compromise between your craving and your desire to not spend three hours in the kitchen.
Let’s make something amazing that won’t make you want to pull your hair out.
What You’ll Need
I’ve broken this down into the three parts. Don’t let it scare you; it’s mostly stuff you probably have lying around.
For the Soft-Batch Cookies:
- 1 ½ cups all-purpose flour
- ½ teaspoon baking soda
- ¼ teaspoon salt
- ½ cup unsalted butter, softened to room temperature
- ⅔ cup granulated sugar
- 1 large egg
- 1 teaspoon vanilla extract
For the Creamy Filling:
- 1 cup milk (whole milk is best)
- ¼ cup granulated sugar
- 2 tablespoons cornstarch
- 2 large egg yolks
- 1 tablespoon unsalted butter
- 1 ½ teaspoons vanilla extract
For the Chocolate Ganache Topping:
- 4 ounces semi-sweet chocolate, chopped
- ½ cup heavy cream
Pro Tips
Look, I’ve made these enough times to know where things can go sideways. Here’s how to avoid my past mistakes.
- Chill Your Dough. No Excuses. I know, I know. It’s the most annoying step in any cookie recipe. But if you skip it, your cookies will spread into flat, sad discs. A chilled dough makes a puffier, softer, more cake-like cookie. Just do it.
- The Thumbprint is Key. When you make the indent in the cookie for the filling, do it right after they come out of the oven. They’re soft and forgiving then. If you wait, they’ll crack. I use the back of a ½ teaspoon measuring spoon for the perfect little well.
- Don’t Boil the Filling. When you’re making the pastry cream, you want it to thicken, not turn into scrambled eggs. Keep the heat on medium-low and whisk like your life depends on it. The second it gets thick and bubbly, pull it off the heat.
- Patience with the Ganache. After you pour the hot cream over the chocolate, just let it sit for 5 minutes. Don’t touch it. Let the heat do the work. If you start stirring right away, you can get a grainy texture. Let it sit, then stir gently from the center outwards for a silky smooth finish.
Tools Required for the Job
You don’t need a professional kitchen, just a few basics. Here’s the list so you can get everything out before you start.
| Tool | Why You Need It |
|---|---|
| Baking Sheets | To bake the cookies on. |
| Parchment Paper | Stops sticking, makes life easier. |
| Mixing Bowls | One for dry, one for wet, one for ganache. |
| Whisk & Spatula | For mixing and scraping. |
| Small Saucepan | For the filling and the cream. |
Possible Substitutions and Variations
Don’t have everything? Don’t panic. Here are a few swaps that work just fine.
| Original Ingredient | Substitution | A Quick Note |
|---|---|---|
| Unsalted Butter | Salted Butter | Just reduce the added salt by half. |
| All-Purpose Flour | 1-to-1 Gluten-Free Flour | Works well for a GF version. |
| Semi-Sweet Chocolate | Dark or Milk Chocolate | Your cookie, your choice! |
| Granulated Sugar | Half brown, half white sugar | Gives a slightly richer, chewier cookie. |
Make-Ahead Tips
You can totally break this up to make it less of a project.
The cookie dough can be made and stored in the fridge for up to 3 days. Just wrap it up tightly in plastic wrap.
You can also bake the cookies (without the filling) a day ahead. Store them in an airtight container once they’re completely cool.
How to Make Boston Cream Pie Cookie Bites
Okay, let’s get into it. Follow these steps and you’ll be golden.
Making the Soft-Batch Cookies:
Step 1: In a medium bowl, whisk together the flour, baking soda, and salt. Set that aside. That’s your dry team.
Step 2: In a separate, larger bowl, beat the softened butter and sugar together with a mixer until it’s light and fluffy. This usually takes a couple of minutes.
Step 3: Add the egg and vanilla extract to the butter mixture and beat until it’s just combined. Don’t go crazy here.
Step 4: Gradually add the dry ingredients to the wet ingredients, mixing on low speed until you can’t see any more flour streaks. Again, don’t overmix it.
Step 5: Cover the bowl and chill the dough in the refrigerator for at least 1 hour. Yes, I’m reminding you again.
Step 6: Preheat your oven to 350°F (175°C) and line two baking sheets with parchment paper.
Step 7: Roll the chilled dough into 1-inch balls and place them about 2 inches apart on the baking sheets.
Step 8: Bake for 10-12 minutes, or until the edges are lightly golden. They should look a little soft in the center.
Step 9: As soon as they come out of the oven, use the back of a small spoon or your thumb to gently press an indent into the center of each warm cookie. Let them cool on the sheet for 5 minutes before moving them to a wire rack to cool completely.
Whipping Up the Creamy Filling:
Step 1: In a small saucepan, whisk together the sugar and cornstarch. Then, whisk in the milk and egg yolks until it’s smooth.
Step 2: Cook this mixture over medium-low heat, whisking constantly. You can’t walk away. It will thicken up in about 5-7 minutes. Once it’s thick like pudding, remove it from the heat.
Step 3: Stir in the butter and vanilla extract. Transfer the cream to a small bowl, cover it with plastic wrap pressed directly onto the surface (to prevent a skin from forming), and chill in the fridge for at least 30 minutes.
The Chocolate Ganache Topping:
Step 1: Place your chopped chocolate in a heatproof bowl.
Step 2: Heat the heavy cream in a small saucepan over medium heat until it just begins to simmer around the edges. Don’t let it boil over.
Step 3: Pour the hot cream over the chocolate and let it sit undisturbed for 5 minutes. Then, gently stir until the ganache is smooth and glossy.
Putting It All Together:
Step 1: Once the cookies and filling are cool, spoon or pipe a small amount of the vanilla cream filling into the indent of each cookie.
Step 2: Drizzle or spoon the chocolate ganache over the filling. Let the ganache set for about 15-20 minutes before serving.
Nutritional Breakdown and More
Just a heads up, this is a rough estimate. Your mileage may vary based on exact ingredients and portion sizes.
| Estimated Nutrition (per cookie) | |
|---|---|
| Calories | Approx. 120 kcal |
| Fat | 7g |
| Carbohydrates | 13g |
| Protein | 2g |
Ingredient Swaps for Diets
- Dairy-Free: Use a dairy-free butter substitute, plant-based milk (like almond or soy), and coconut cream instead of heavy cream. Use dairy-free chocolate chips.
- Gluten-Free: As mentioned, a good 1-to-1 gluten-free baking flour blend should work well for the cookie base.
Meal Pairing Suggestions
Let’s be real, these are the main event. They pair perfectly with a cup of coffee, a cold glass of milk, or maybe a second cookie. No judgment here.
Cooking Time Efficiency Tips
To be a kitchen ninja, make the filling while the dough is chilling. Then, while the cookies are baking, you can prep the ganache ingredients. By the time the cookies cool, everything else is ready to go.
Leftovers and Storage
Because of the creamy filling, these cookies need to be stored in the refrigerator.
Place them in an airtight container in a single layer if possible. They’ll stay fresh and delicious for up to 3 days. They get even softer and cakier by day two, which is a nice little bonus.
Frequently Asked Questions (FAQ)
Q1. Can I use instant vanilla pudding mix for the filling?
Ans: You could in a pinch, but the homemade stuff is so much better and doesn’t have that artificial taste. It’s worth the extra 10 minutes, I promise.
Q2. My ganache is too thick/thin. How do I fix it?
Ans: If it’s too thick, stir in a tiny bit more warm cream (a teaspoon at a time) until it reaches the right consistency. If it’s too thin, let it cool a bit longer, or add a few more chocolate chips and stir until melted and smooth.
Q3. Can I freeze these cookies?
Ans: It’s best to freeze the cookie bases before filling them. Let them cool completely, then freeze in an airtight container. When you’re ready, thaw them at room temperature and then add the fresh filling and ganache.
Wrapping Up
So there you have it. A totally manageable way to satisfy a giant pie craving without all the drama.
These little bites are honestly impressive. They look like you spent way more time on them than you actually did, which is always a win in my book.
Go on, give it a shot. I think you’ll be pretty happy with the result.
If you make them, drop a comment below! I’d love to hear how they turned out for you or if you have any questions along the way.