“`html
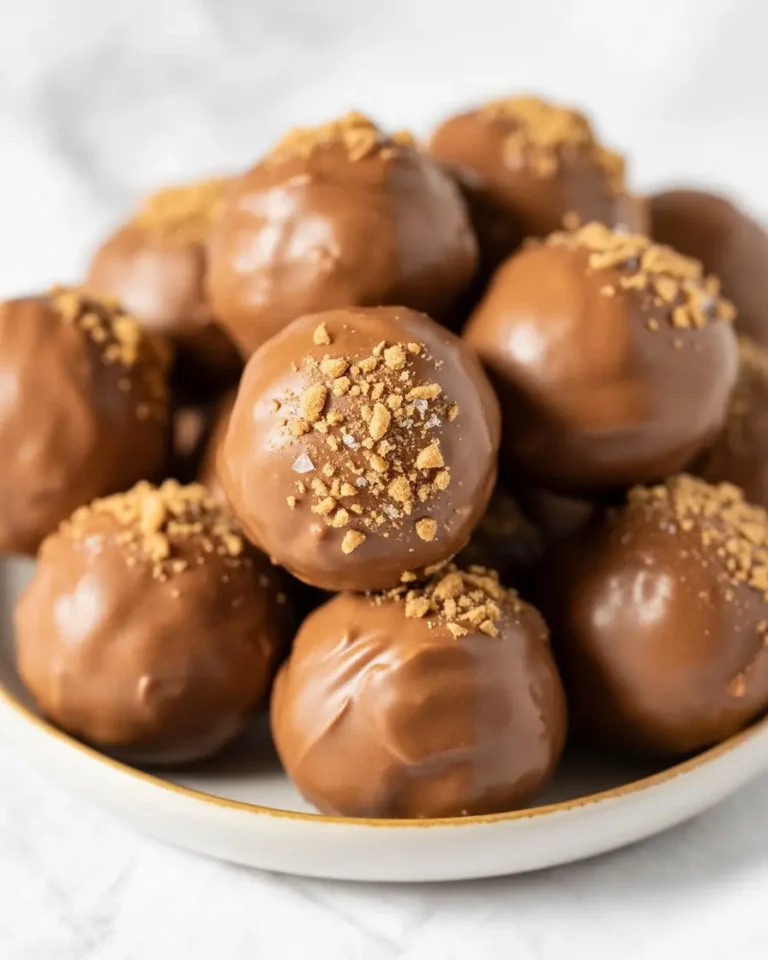
The Only Chocolate Peanut Butter No-Bake Cookie Recipe You’ll Ever Need
Some days just demand a cookie. I’m not talking about a “plan ahead, chill the dough, and preheat the oven” kind of cookie. I mean an “I need chocolate and peanut butter in my face within the next 15 minutes or I might just short-circuit” kind of cookie.
This is that cookie.
I feel like everyone has a memory of these. Maybe your grandma made them, or you whipped them up after school with friends. They’re a little bit messy, incredibly forgiving, and taste like pure, uncomplicated happiness.
They were one of the first things I ever learned to “cook” by myself, and that feeling of creating something so delicious so quickly was just… magic. It’s less about precise baking and more about controlled chaos in a saucepan, which is my kind of cooking.
So if you’re having one of those days, or you just want a ridiculously easy treat that delivers every single time, you’ve come to the right place. Let’s make something awesome.
What You’ll Need
The ingredient list is super simple, which is the whole point. You probably have most of this stuff sitting in your pantry right now, just waiting for its moment to shine.
- Granulated Sugar: The classic sweetener that provides the structure.
- Unsalted Butter: This gives the cookies richness and helps them set.
- Milk: Whole milk is great for richness, but honestly, whatever you have works.
- Unsweetened Cocoa Powder: This is for that deep chocolate flavor. Don’t use hot cocoa mix!
- Creamy Peanut Butter: The heart and soul of the cookie. Standard creamy stuff like Jif or Skippy works best for texture.
- Quick-Cooking Oats: These are key. They act as the body of the cookie. Old-fashioned rolled oats can be used, but the texture will be chewier.
- Vanilla Extract: A little splash just makes everything taste better.
- Salt: Just a pinch to balance all that sweetness. Seriously, don’t skip it.
Tools Required
You don’t need any fancy gadgets. This is a low-tech operation, which is part of its charm.
- A medium saucepan
- Measuring cups and spoons
- A wooden spoon or spatula
- Two regular spoons (for dropping the cookies)
- Parchment paper or wax paper
- A baking sheet
The Step-by-Step Instructions
Okay, here we go. The most important part of this whole process happens in about 60 seconds, so read through this once before you start. It all happens fast.
Step 1: Lay out a sheet of parchment paper or wax paper on your counter or on a baking sheet. This is where your cookies will cool. Do this first, because you won’t have time later.
Step 2: In your medium saucepan, combine the sugar, butter, milk, and cocoa powder. Turn the heat to medium and stir it all together as the butter melts.
Step 3: Bring the mixture to a full, rolling boil. This is the crucial part. Once it hits that rolling boil (where the bubbles can’t be stirred down), start a timer for exactly one minute. Stir constantly.
Step 4: After that one minute is up, immediately remove the pan from the heat. Don’t guess on the time. Too short and they won’t set; too long and they’ll be dry and crumbly.
Step 5: Stir in the peanut butter, vanilla extract, and salt until the peanut butter is completely melted and the mixture is smooth.
Step 6: Dump in the quick-cooking oats and stir quickly until everything is just combined. You have to work fast here before it starts to set in the pan.
Step 7: Using two spoons, drop tablespoon-sized heaps of the mixture onto your prepared parchment paper. They don’t have to be perfect circles. They’re not supposed to be.
Step 8: Now for the hardest part: let them sit. They need about 20-30 minutes at room temperature to cool and set up completely. You can pop them in the fridge to speed it up if you’re impatient (I always am).
Pro Tips From My Many, Many Mistakes
I’ve made every mistake possible with these cookies, so you don’t have to. Here’s what I’ve learned.
- The Boil is Everything: I can’t stress this enough. A weak simmer is not a rolling boil. You need big, active bubbles. Use a timer. One full minute. This cooks the sugar to the right stage to create a fudge-like texture that holds the cookie together.
- Have Everything Ready (Mise en Place): Before you even turn on the stove, measure out your peanut butter, oats, and vanilla. The process moves way too fast to be scrambling for ingredients mid-boil.
- Peanut Butter Matters: The super oily, “natural” peanut butters can sometimes mess with the texture and prevent the cookies from setting properly. Good old-fashioned creamy peanut butter is the most reliable choice for getting that classic texture. If you love crunchy, go for it, but the texture will be, well, crunchier.
- Humidity is the Enemy: This is a weird one, but it’s true. Making these on a super rainy or humid day can sometimes affect how they set. The sugar in the recipe can pull moisture from the air. If they’re a little sticky, just pop them in the fridge for a bit longer.
Substitutions and Variations
Part of the fun is making these your own. They’re a great base for a little experimentation. Here are a few ideas to get you started.
| To Swap Out | Try This Instead | What to Expect |
|---|---|---|
| Peanut Butter | Almond Butter, SunButter | Different nutty flavor. |
| Quick-Cooking Oats | Old-Fashioned Rolled Oats | A much chewier texture. |
| Milk | Almond Milk, Soy Milk | Works great, slight flavor change. |
| Mix-ins | Shredded Coconut, Mini M&Ms | Add with the oats for extra fun. |
Dietary Swaps, Pairings, and Other Good Stuff
Look, these are cookies. They’re a treat. But you can make a few tweaks if you need to fit them into a specific lifestyle.
Making Them Work for You
| Dietary Need | Simple Swap |
|---|---|
| Gluten-Free | Use certified gluten-free oats. |
| Vegan / Dairy-Free | Use plant-based butter and non-dairy milk (like almond or soy). |
How to Serve These Beauties
The best and only way to eat these is with a giant glass of ice-cold milk. I will not be taking questions on this. It’s the perfect combo to cut through the richness of the chocolate and peanut butter.
They also make an amazing “I’m sorry you had a bad day” gift for a friend, packed into a simple container. It’s basically a hug in cookie form.
Cooking Time Efficiency
The whole point of these is speed. To make it even faster, follow the “pro tip” about measuring everything first. Line up your ingredients like you’re on a cooking show. Once the pot hits the heat, you should be done and dropping cookies in under five minutes.
Leftovers and Storage
If you somehow have leftovers, which is a big “if” in my house, storing them is easy.
Just place them in an airtight container. They’ll be fine on the counter for about 3 days, or in the fridge for up to a week. I actually prefer them cold from the fridge—they get extra firm and fudgy.
Frequently Asked Questions
Here are some of the questions that always pop up. Let’s get them answered.
Q1. Why are my cookies so dry and crumbly?
Ans: This is the classic sign that you boiled the mixture for too long. Even an extra 30 seconds can cook out too much moisture. Stick to that one-minute boil like your life depends on it.
Q2. Help! My cookies are gooey and won’t set. What did I do wrong?
Ans: This is the opposite problem. You probably didn’t boil it long enough. The mixture needs to hit a full, rolling boil and stay there for the full minute to reach the right temperature to set properly.
Q3. Can I use old-fashioned rolled oats instead of quick oats?
Ans: You can, but it changes the texture a lot. The cookies will be much chewier and less uniform. Quick oats absorb the liquid better, giving you that classic fudgy texture.
Q4. Can I reduce the sugar?
Ans: I wouldn’t recommend it. The sugar isn’t just for sweetness here; it’s a critical part of the chemical reaction that makes the cookies set. Reducing it will likely result in a gooey mess.
Q5. Can I freeze no-bake cookies?
Ans: Absolutely! They freeze beautifully. Just let them set completely, then place them in a freezer-safe bag or container with layers of parchment paper between them so they don’t stick together. They’ll last for a couple of months.
Wrapping Up
And that’s it. It’s barely even a recipe, more like a formula for instant gratification.
There’s something so satisfying about making something so delicious with so little effort. It’s a reminder that good things don’t always have to be complicated.
So go on, give it a try. Get your saucepan out and make a batch. Then come back and leave a comment—I’d love to hear how they turned out for you or if you discovered any fun variations!
“`