“`html
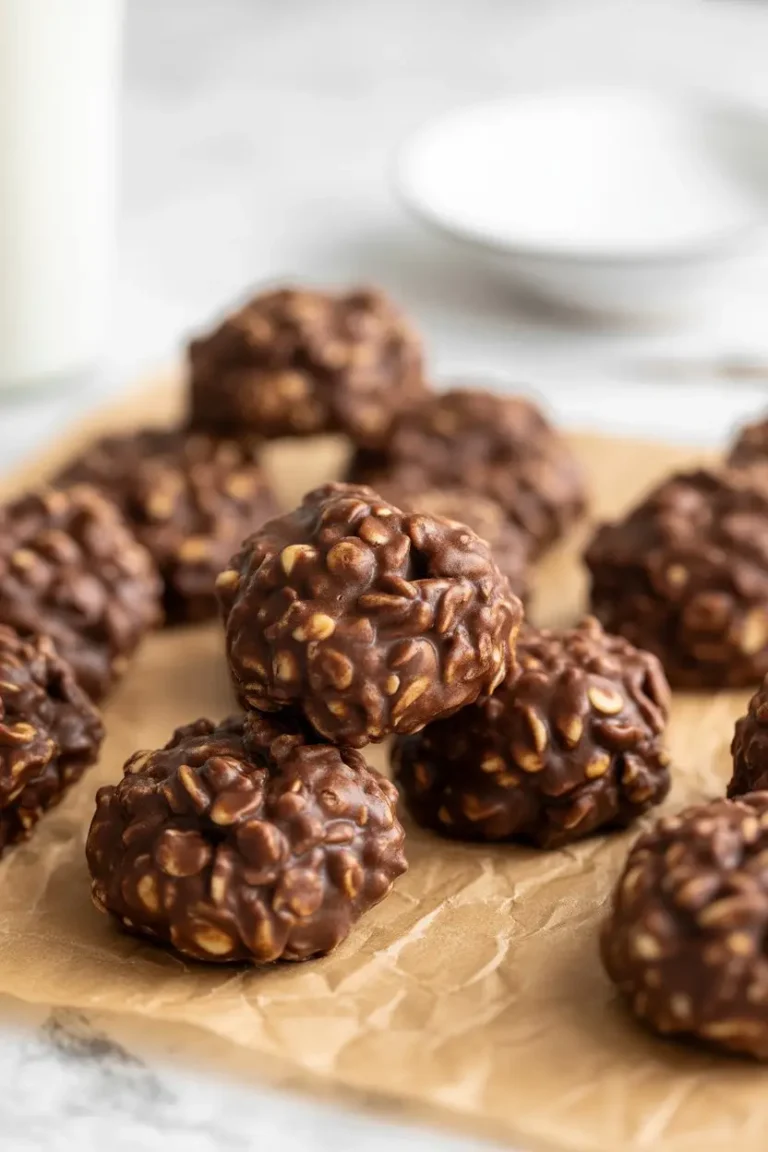
The Only Chocolate Peanut Butter No-Bake Cookie Recipe You’ll Ever Need
You know that feeling, right? It’s late, you’ve had a day, and a craving for something sweet, chocolaty, and comforting hits you like a ton of bricks.
The last thing you want to do is preheat an oven and get into a whole big baking project. Heck no. You want cookies, and you want them now.
This is where the magic of no-bake cookies comes in.
I have a soft spot for these because they were the first “recipe” I ever truly mastered. They’re forgiving, ridiculously fast, and the payoff is huge. It’s pure, simple comfort in a cookie.
So let’s make something that will make you feel good. Something easy and delicious that doesn’t ask for much in return.
What You’ll Need
First things first, let’s gather up our ingredients. The beauty of this recipe is that you probably have most, if not all, of this stuff in your pantry right now. No weird, hard-to-find items here.
- 2 cups granulated sugar
- 1/2 cup (1 stick) unsalted butter
- 1/2 cup milk (whole milk works best, but see substitutions!)
- 4 tablespoons unsweetened cocoa powder
- 1/2 cup creamy peanut butter
- 1 teaspoon pure vanilla extract
- 3 cups quick-cooking oats
- Pinch of salt
Tools Required
You don’t need any fancy gadgets for this. We’re keeping it simple and straightforward.
- Medium-sized saucepan
- Measuring cups and spoons
- A sturdy spoon or spatula for mixing
- Two baking sheets
- Parchment paper or wax paper
Pro Tips
Okay, before you start, I want to share a few little secrets I’ve learned over the years. These are the things that take your cookies from “good” to “oh my gosh, what is in these?”
1. The Boil is Everything. This is the most critical part. When you bring the sugar, butter, milk, and cocoa mixture to a boil, you need to let it have a full, rolling boil for exactly 60 seconds. Use a timer! If you boil it for too short a time, your cookies will be sticky and won’t set properly. Too long, and they’ll end up dry and crumbly. One minute is the magic number.
2. Work Fast. Once you take that chocolate mixture off the heat and add the other ingredients, the clock is ticking. The mixture starts to set up almost immediately. Have your oats and peanut butter measured and ready to go so you can mix and scoop without a panic.
3. Don’t Skimp on Peanut Butter Quality. You don’t need a fancy, expensive brand, but avoid the “natural” peanut butters where the oil separates. They can mess with the texture. A classic, creamy peanut butter like Jif or Skippy gives the most reliable, perfect result.
4. Salt is Not Optional. It might seem like a tiny amount, but that pinch of salt makes a world of difference. It balances the sweetness and makes the chocolate and peanut butter flavors pop. Don’t skip it!
Substitutions and Variations
One of the best things about this recipe is how easy it is to tweak. Got an allergy or just want to try something new? I got you.
| Ingredient | Substitution Idea | Notes |
|---|---|---|
| Peanut Butter | Almond, cashew, or sun butter | Changes the flavor profile completely! |
| Unsalted Butter | Coconut oil or vegan butter stick | Great for a vegan-friendly version. |
| Milk | Almond, soy, or oat milk | Works well, may be slightly less rich. |
| Quick-Cooking Oats | Old-fashioned rolled oats | Results in a much chewier texture. |
Want to get creative? Try adding a half cup of shredded coconut or mini chocolate chips along with the oats for extra texture and flavor.
How to Make Chocolate Peanut Butter No-Bake Cookies
Alright, let’s do this. Get your station ready, because things move quickly once they start.
Step 1: Lay out your parchment or wax paper on your baking sheets. This is your landing zone for the cookies.
Step 2: In your medium saucepan, combine the sugar, butter, milk, and cocoa powder.
Step 3: Place the saucepan over medium heat. Stir constantly until the butter is melted and the sugar is dissolved.
Step 4: Bring the mixture to a full rolling boil. Once it’s boiling, stop stirring and let it boil for exactly 60 seconds. Set a timer!
Step 5: Immediately remove the pan from the heat. Quick, now!
Step 6: Stir in the peanut butter, vanilla extract, and pinch of salt until the peanut butter is completely melted and the mixture is smooth.
Step 7: Add the quick-cooking oats and stir until they are just combined. Don’t overmix, or you’ll break down the oats.
Step 8: Working quickly, drop rounded tablespoons of the mixture onto your prepared parchment paper. They will start to set as you go.
Step 9: Let the cookies sit at room temperature for at least 30-45 minutes to firm up completely. You can also pop them in the fridge to speed this up.
Nutrition, Pairings, and More
Let’s be real, these are a treat. But it’s still nice to know what you’re working with.
| Estimated Nutrition & Diet Swaps | |
|---|---|
| Serving Size | 1 cookie (approx.) |
| Calories | ~150 kcal |
| To Make Gluten-Free | Use certified gluten-free oats. |
| To Make Vegan | Use vegan butter and non-dairy milk. |
Meal Pairing Suggestions
These cookies are a dessert, through and through. They are absolutely perfect with a tall, cold glass of milk. They also go great with a cup of coffee or black tea to cut through the richness.
Cooking Time Efficiency
The biggest tip here is “mise en place,” which is just a fancy way of saying have everything measured and ready before you start. Measure out your oats, peanut butter, and vanilla into separate bowls while the chocolate mixture is coming to temperature. It makes the final steps way less chaotic.
Leftovers and Storage
If you somehow have leftovers, storing them is super easy.
Just place the completely cooled cookies in an airtight container. They’ll stay fresh at room temperature for about 3-4 days. If you want them to last longer, you can store them in the fridge for up to two weeks.
They taste great straight from the fridge, too!
Frequently Asked Questions
Q1. Why didn’t my cookies set? They’re still gooey.
Ans: This is the most common issue! It almost always means the sugar mixture wasn’t boiled for the full 60 seconds. That boiling time is what gets the sugar to the right temperature to crystallize and set properly.
Q2. My cookies are dry and crumbly. What did I do wrong?
Ans: This is the opposite problem. You likely boiled the mixture for too long. Going over that 60-90 second mark boils out too much moisture, leaving you with a dry, stiff final product.
Q3. Can I use old-fashioned rolled oats instead of quick-cook?
Ans: You can, but it will change the texture. Quick oats are cut finer and absorb the liquid more evenly, creating a fudgy texture. Old-fashioned oats are whole and will result in a much chewier, more distinct “oat-y” cookie. Some people prefer it that way!
Q4. Can I freeze these cookies?
Ans: Yes, absolutely! Place them in a single layer on a baking sheet to freeze solid, then transfer them to a freezer-safe bag or container. They’ll last for up to 3 months. Just let them thaw for a few minutes on the counter before eating.
Wrapping Up
So there you have it. A super simple, ridiculously fast, and incredibly satisfying recipe that will solve just about any sweet tooth emergency.
There’s a reason this recipe has been passed around for generations. It’s reliable, it’s comforting, and it just works. It’s the kind of cooking that’s more about feeling than fuss.
Now it’s your turn. Give these a try the next time that craving hits.
I’d honestly love to hear how they turn out for you. Did you try any variations? Did they bring back any good memories? Drop a comment below and let me know!
“`