Some days you just need a cookie. Not just any cookie, but one that solves a real problem.
You know the one. The “Do I want an oatmeal cookie, a peanut butter cookie, or a chocolate chip cookie?” problem. It’s a serious dilemma.
Well, I’m here to tell you to stop choosing. Just stop.
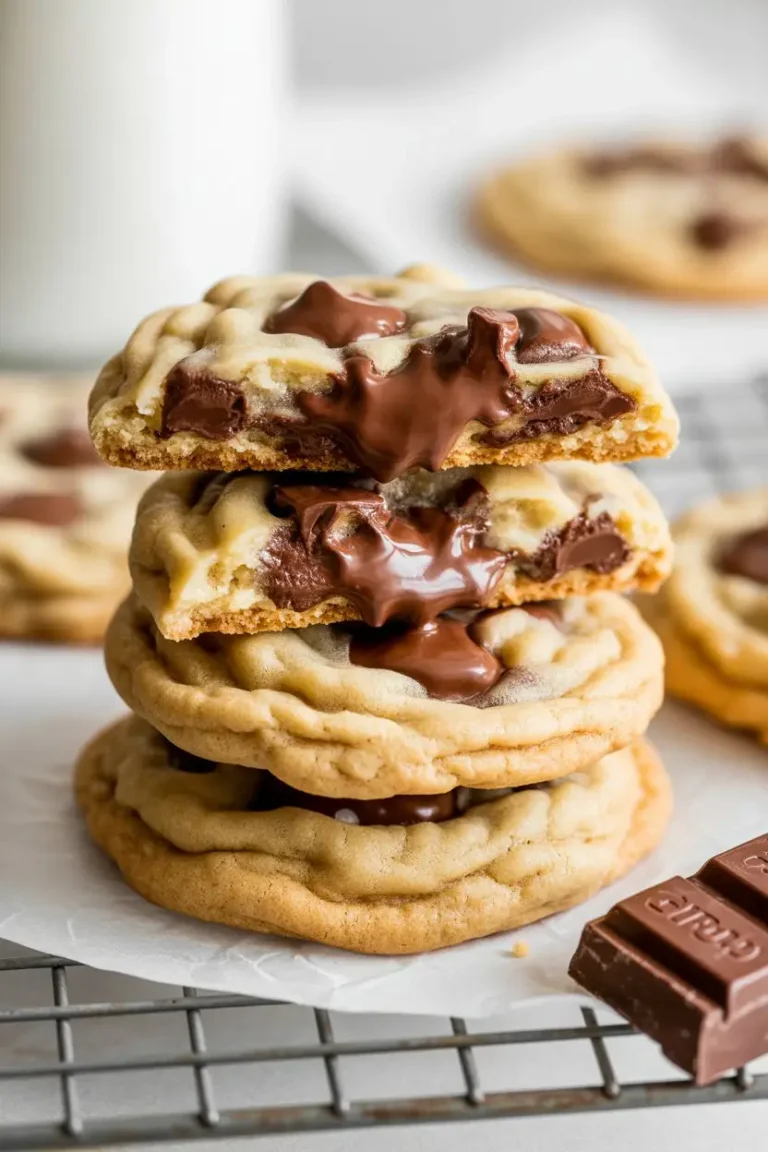
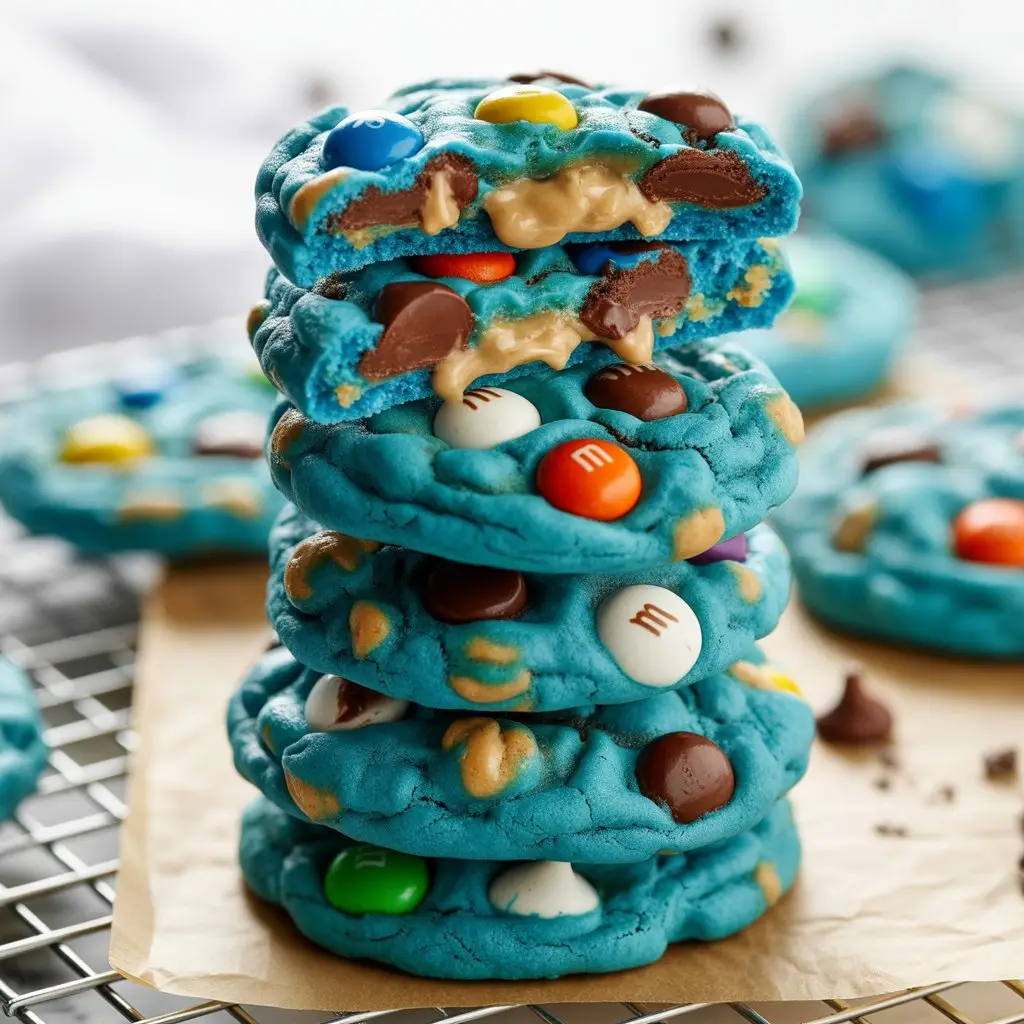
Because what if you could have ALL OF THAT in one single, glorious, giant cookie? That’s the magic of the monster cookie. It’s the cookie that couldn’t make up its mind, so it just decided to be everything at once.
And honestly, I respect that.
This isn’t about being fancy. This is about pure, unadulterated cookie joy. It’s about creating something that’s just unapologetically delicious and packed with all the good stuff.
So let’s get to it. Your dessert-related decision fatigue is officially over.
What You’ll Need
Okay, the list looks a little long, but don’t panic! It’s mostly just a bunch of awesome things you’re throwing into a bowl. It’s basically a party, and all these ingredients are invited.
For the Cookie Dough:
- 1/2 cup unsalted butter, softened
- 1 cup creamy peanut butter
- 1 cup packed brown sugar
- 1/2 cup granulated sugar
- 2 large eggs
- 1 teaspoon vanilla extract
- 1/2 cup all-purpose flour
- 2 cups quick-cooking oats (NOT old-fashioned, this is important!)
- 1 teaspoon baking soda
- 1/2 teaspoon salt
The “Monster” Mix-Ins:
- 1 cup M&M’s candies
- 1 cup semi-sweet chocolate chips
Tools of the Cookie Trade
You don’t need a professional kitchen, just a few basics. Here’s the rundown:
- Large mixing bowl (or a stand mixer if you’re fancy)
- Hand mixer or a good old-fashioned whisk and spatula
- Measuring cups and spoons
- Baking sheets
- Parchment paper (Trust me, this makes cleanup SO much easier)
- A cookie scoop (or a spoon, but the scoop is a game-changer)
- Wire rack for cooling
Step-by-Step: Let’s Make Some Monsters
Alright, time for the fun part. Follow these steps and you’ll be in cookie heaven before you know it.
Step 1: Preheat your oven to 350°F (175°C). Line a couple of baking sheets with parchment paper. This little step will save you from a future of scrubbing.
Step 2: In your large bowl, beat the softened butter, peanut butter, brown sugar, and granulated sugar together until it’s all creamy and smooth. This should take about 2 minutes with a mixer.
Step 3: Add the eggs one at a time, mixing well after each one. Then, mix in the vanilla extract. Your kitchen should be starting to smell amazing right about now.
Step 4: In a separate, smaller bowl, whisk together the all-purpose flour, quick-cooking oats, baking soda, and salt. Just give it a quick mix to combine everything.
Step 5: Gradually add the dry ingredients to your wet ingredients. Mix on low speed until JUST combined. And I mean JUST. Over-mixing is the enemy of a good cookie.
Step 6: Now for the best part. Gently fold in the M&M’s and chocolate chips with a spatula. Try to get them evenly distributed, but also try not to eat all the dough. It’s a challenge.
Step 7: Use a cookie scoop (or a heaping tablespoon) to drop dough onto your prepared baking sheets. Make sure to leave about 2 inches between them because these monsters like to spread out.
Step 8: Bake for 10-12 minutes. The edges should be lightly golden brown, but the centers should still look a little soft. They’ll continue to bake on the hot pan for a minute after you pull them out.
Step 9: Let the cookies cool on the baking sheet for about 5 minutes before moving them to a wire rack to cool completely. This part is CRUCIAL for them to set up properly.
Pro Tips from My Kitchen
I’ve made my fair share of not-so-great cookies in the past. Here are a few things I learned so you don’t have to.
1. DO NOT Over-mix the Dough: I said it before, and I’ll say it again. Once you add the flour and oats, mix only until you can’t see any more dry streaks. Over-mixing develops the gluten in the flour too much and makes the cookies tough instead of chewy.
2. Chill the Dough (If You Have Time): If your cookies tend to spread into thin, sad pancakes, your dough might be too warm. Pop the bowl of dough in the fridge for 30 minutes before scooping. This helps the fat solidify and makes the cookies bake up thicker. It’s an optional step but a really good one.
3. The Secret is in the Oats: This recipe specifically calls for quick-cooking oats. They have a finer texture and absorb moisture differently than old-fashioned rolled oats. Using rolled oats can make your cookies dry and crumbly. Stick with the quick ones for that perfect chewy texture.
4. Underbake, Just a Little: The key to a soft, chewy cookie is to pull it from the oven when the center still looks a tiny bit underdone. It will set up on the hot baking sheet. If you wait until it looks perfectly done in the oven, it will be hard as a rock once it cools.
Possible Substitutions and Variations
Want to mix things up? I support that. These cookies are super forgiving. Here are a few ideas to get you started.
| Ingredient | Substitution Idea | Notes |
|---|---|---|
| M&M’s / Chocolate Chips | Reese’s Pieces, butterscotch chips, white chocolate chips, chopped nuts. | Keep the total amount of mix-ins to about 2 cups. |
| Creamy Peanut Butter | Crunchy peanut butter. | Adds a nice extra texture. I wouldn’t recommend natural peanut butter. |
| All-Purpose Flour | 1-to-1 gluten-free baking flour blend. | Make sure your oats are also certified gluten-free! |
Make-Ahead Tips
Life gets busy, I get it. The good news is, cookie dough waits for no one… except when you want it to.
You can prepare the dough, cover the bowl tightly with plastic wrap, and refrigerate it for up to 3 days.
Or, for future cookie emergencies, scoop the dough onto a parchment-lined baking sheet and freeze until solid. Then transfer the frozen dough balls into a freezer bag. They’ll keep for up to 3 months. You can bake them straight from frozen, just add 2-3 extra minutes to the baking time.
Nutrition, Pairings, and Other Good Stuff
Let’s be honest, we’re not making these for our health. But if you’re curious, here’s a rough idea.
| Nutrient (Approx. per cookie) | Amount |
|---|---|
| Calories | 220-250 kcal |
| Fat | 12g |
| Carbohydrates | 25g |
| Protein | 5g |
*This is just an estimate! It can vary based on your specific ingredients and cookie size.
Meal Pairing Suggestions: The best thing to pair with a monster cookie is a giant glass of cold milk. That’s it. That’s the suggestion. Okay, fine, a scoop of vanilla ice cream in between two of these cookies is also an acceptable answer.
Cooking Time Efficiency: While one batch is in the oven, get your next baking sheet loaded up with dough. It creates a nice little assembly line of cookie production.
Leftovers and Storage
If you somehow have leftovers, you’ll want to store them right to keep them soft and chewy.
Place the completely cooled cookies in an airtight container at room temperature. They should stay fresh for up to 5 days.
A classic trick: add a slice of bread to the container. The cookies will absorb moisture from the bread, keeping them super soft. It sounds weird, but it totally works.
Frequently Asked Questions
Q1. Why are my cookies so flat?
Ans: This is usually because the butter was too soft or the dough was too warm. Try chilling the dough for 30-60 minutes before baking. Also, make sure you’re using quick-cooking oats, not old-fashioned ones!
Q2. Can I use natural peanut butter?
Ans: I’d advise against it. Natural peanut butters have a lot of oil separation and can really change the texture of the cookie, often making them greasy or crumbly. A classic commercial brand like Jif or Skippy works best here.
Q3. Why are they called “Monster” cookies?
Ans: A couple of reasons! First, they are often made HUGE. Second, they are a “Frankenstein’s monster” of a cookie, made up of parts from other classic cookies (oatmeal, peanut butter, chocolate chip).
Q4. My cookies came out hard. What did I do wrong?
Ans: You probably overbaked them. Remember to pull them from the oven when the centers still look a little soft. They will finish setting up on the hot pan.
Wrapping Up
So there you have it. A cookie that’s a little chaotic, a little over-the-top, and a whole LOT of delicious.
This recipe is more of a guideline for happiness than a strict set of rules. Feel free to make them your own. Throw in some different chips, add some nuts, make them giant, or make them small.
The whole point is to have fun and end up with something that makes you feel good.
Now go on, make a batch. You absolutely deserve it. And if you try them, I’d love to hear about it! Drop a comment below and let me know how they turned out or if you have any questions.