Sometimes a craving hits you, and it’s not a subtle little nudge. It’s a full-on, gotta-have-it-now kind of feeling. That was me last week, wanting something that screamed “fall” but didn’t require me to be a professional pastry chef.
Enter the sheet cake. Seriously, they’re the unsung heroes of the dessert world. They feed a bunch of people, they’re pretty hard to mess up, and they’re basically a delivery vehicle for amazing toppings.
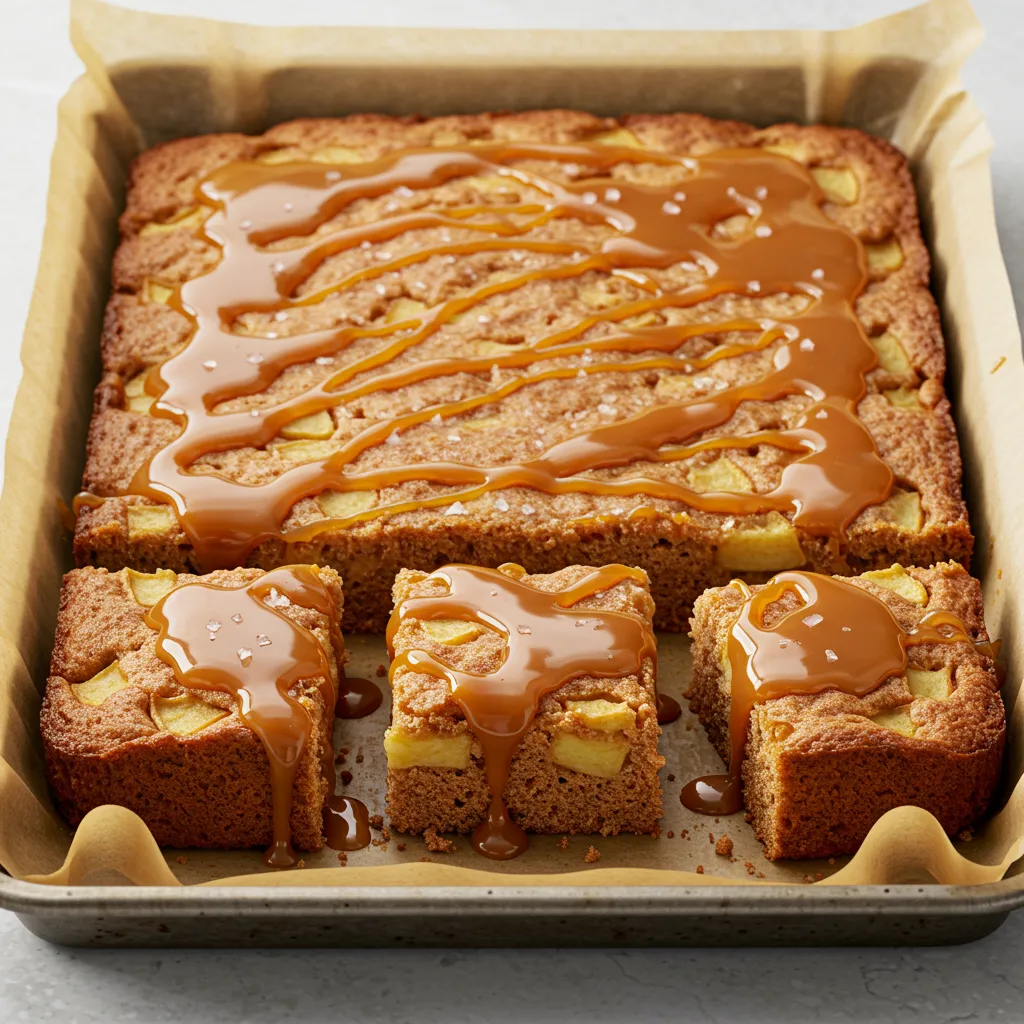
This cake is the perfect middle ground. It’s cozy and spiced, packed with tender apples, and then just completely drenched in a homemade salted caramel sauce. It’s the kind of thing you make for a get-together, but then hide a few slices for yourself for later. No judgment here.
So, let’s make something that will make your whole house smell incredible.
What You’ll Need
Here’s the list of ingredients. Don’t let it scare you; it’s mostly stuff you probably already have in your pantry, especially if you’ve done any baking this season.
For the Apple Topping:
- 4 medium apples (Granny Smith or Honeycrisp are great)
- 2 tablespoons unsalted butter
- 1/4 cup brown sugar, packed
- 1 teaspoon ground cinnamon
- 1/4 teaspoon ground nutmeg
For the Cake:
- 2 1/2 cups all-purpose flour
- 1 1/2 teaspoons baking soda
- 1 teaspoon ground cinnamon
- 1/2 teaspoon salt
- 1/2 teaspoon ground ginger
- 1/4 teaspoon ground cloves
- 1 cup unsalted butter, softened
- 1 1/2 cups granulated sugar
- 1/2 cup brown sugar, packed
- 4 large eggs, at room temperature
- 1 tablespoon vanilla extract
- 1 cup buttermilk
For the Salted Caramel Sauce:
- 1 cup granulated sugar
- 1/4 cup water
- 6 tablespoons unsalted butter, cut into pieces
- 1/2 cup heavy cream
- 1 teaspoon flaky sea salt (like Maldon)
Pro Tips
I’ve made this cake a few times, and I’ve definitely learned a thing or two (mostly by messing up). Here are a few tips so you can get it right the first time.
- Pre-Cook Your Apples: Don’t just throw raw apples on top. Sautéing them for a few minutes first is a game-changer. It makes them super tender and stops them from releasing too much water into the cake, which can make it soggy.
- Don’t Overmix the Batter: Once you start adding the flour mixture, mix it only until it’s just combined. A few little streaks of flour are fine. Overmixing develops the gluten and can make your cake tough and dense instead of soft and fluffy.
- Trust the Caramel Process: Making caramel can feel intimidating. The key is to just let it be. After you combine the sugar and water, don’t stir it. Just swirl the pan occasionally. Stirring can make it crystallize, and you’ll end up with a grainy mess instead of a smooth sauce.
- Room Temperature Ingredients are a Must: This isn’t just a suggestion. Using room temperature butter, eggs, and buttermilk helps everything mix together into a smooth, uniform batter. Cold ingredients don’t emulsify properly, and it can affect the final texture of your cake.
Tools Required
You don’t need a ton of fancy equipment for this. Here’s the basic rundown.
- 13×18 inch baking sheet (a half sheet pan)
- Parchment paper
- Large skillet
- Stand mixer or a large bowl with a hand mixer
- Medium saucepan (for the caramel)
- Spatula
- Measuring cups and spoons
- Whisk
Possible Substitutions and Variations
Don’t have something on hand? Or want to mix it up? I got you. Baking is flexible.
| Original Ingredient | Substitution | Notes |
|---|---|---|
| Buttermilk | 1 cup milk + 1 tbsp lemon juice | Let it sit 5 mins. Creates the same acidity. |
| Apples | Pears | Use firm pears like Bosc. Follow the same prep. |
| Spices | Apple pie spice | Use 2 tsp of the blend in place of all spices. |
| All-purpose flour | 1:1 Gluten-free baking flour | Works well for a gluten-free version. |
Make-Ahead Tips
You can totally prep parts of this ahead of time to make your life easier.
- Caramel Sauce: The salted caramel sauce can be made up to a week in advance. Just store it in an airtight container in the fridge. Reheat it gently in the microwave or on the stovetop before drizzling over the cake.
- Apple Topping: You can prepare the apple topping a day ahead. Store it in an airtight container in the fridge.
- The Cake: The cake itself is best the day it’s made, but you can bake it a day in advance. Let it cool completely, then cover it tightly with plastic wrap and store it at room temperature. Add the caramel right before serving.
How to Make Salted Caramel Apple Sheet Cake
Step 1: Prep the Apples
Peel, core, and chop your apples into about half-inch pieces. Melt 2 tablespoons of butter in a large skillet over medium heat.
Step 2: Cook the Apples
Add the apples, brown sugar, cinnamon, and nutmeg to the skillet. Cook, stirring occasionally, for about 5-7 minutes, until the apples are just starting to get tender. You don’t want them mushy. Set them aside to cool down a bit.
Step 3: Get Ready to Bake
Preheat your oven to 350°F (175°C). Line a 13×18 inch baking sheet with parchment paper, leaving a little overhang on the sides to make it easy to lift out later.
Step 4: Combine Dry Ingredients
In a medium bowl, whisk together the flour, baking soda, cinnamon, salt, ginger, and cloves.
Step 5: Cream Butter and Sugars
In the bowl of your stand mixer (or a large bowl with a hand mixer), beat the softened butter with the granulated and brown sugars on medium-high speed until it’s light and fluffy. This usually takes about 3-4 minutes.
Step 6: Add Eggs and Vanilla
Add the eggs one at a time, beating well after each one. Scrape down the sides of the bowl as you go. Mix in the vanilla extract.
Step 7: Alternate Wet and Dry
Turn the mixer to low speed. Add about a third of your flour mixture, followed by half of the buttermilk. Repeat, ending with the last third of the flour mixture. Mix only until it’s just combined. Don’t go crazy here.
Step 8: Assemble and Bake
Pour the batter into your prepared baking sheet and spread it evenly with a spatula. Spoon the cooled apple mixture evenly over the top of the batter.
Step 9: Bake it!
Bake for 25-30 minutes, or until a toothpick inserted into the center of the cake comes out clean. Let the cake cool in the pan on a wire rack.
Step 10: Make the Caramel
While the cake cools, make the sauce. In a medium saucepan, combine the 1 cup of sugar and 1/4 cup of water. Cook over medium-high heat, without stirring, until the sugar dissolves and the mixture turns a deep amber color. This can take 8-10 minutes. Just swirl the pan gently.
Step 11: Finish the Caramel
Once it’s amber, immediately remove the pan from the heat. Carefully whisk in the butter pieces until they’re melted. Then, slowly pour in the heavy cream while whisking constantly. It will bubble up like crazy, so be careful. Stir in the sea salt.
Step 12: Drizzle and Serve
Let the caramel cool for about 10-15 minutes to thicken up a bit. Drizzle it generously all over the cooled cake. You can slice and serve it right away.
More Good Stuff
Here’s a little extra info to help you out.
| Category | Suggestion |
|---|---|
| Nutritional Info | This is a treat! It’s not health food, but it’s worth it. |
| Lighter Version | Replace half the butter in the cake with unsweetened applesauce. |
| Meal Pairing | A scoop of vanilla bean ice cream is basically required. Or a hot cup of coffee. |
| Time Saver | Use a good quality store-bought caramel sauce if you’re in a pinch. |
Leftovers and Storage
If you somehow have leftovers, which is a big “if,” here’s what to do.
You can store the cake, covered, at room temperature for up to 2 days. If you want it to last longer, pop it in the fridge for up to 5 days. Just know that the caramel might get a little firm in the fridge. You can eat it cold (still good!) or let a slice sit out for a few minutes to warm up.
Frequently Asked Questions
Q1. My caramel turned into a hard rock! What happened?
Ans: This usually happens if it gets cooked for too long or at too high a heat. You can try to save it by putting it back on low heat and adding a tablespoon or two of water, whisking constantly. But honestly, it’s sometimes easier to just start over. Don’t stir it next time, just swirl!
Q2. Can I use a different type of apple?
Ans: For sure. I like Granny Smith or Honeycrisp because they’re firm and hold their shape. Gala or Fuji would also work well. I’d probably avoid something like Red Delicious, which can get mealy when baked.
Q3. My cake seems dry. What did I do wrong?
Ans: Two main culprits here: overbaking or overmixing. Make sure you take the cake out as soon as a toothpick comes out clean. And when you’re adding the flour and buttermilk, mix just until you don’t see any more dry spots.
Q4. Can I bake this in a 9×13 inch pan instead?
Ans: Yes, you can! A 9×13 pan is smaller and deeper, so the cake will be thicker. You’ll need to increase the baking time. Start checking it around the 35-minute mark and add time as needed until a toothpick comes out clean.
Wrapping Up
So there you have it. A totally doable, incredibly delicious sheet cake that’s perfect for pretty much any fall occasion. It’s a little bit of effort, but the payoff with that homemade caramel is huge.
Seriously, give this one a try. It makes the house smell amazing and it’s a total crowd-pleaser.
If you make it, I’d love to hear how it went! Drop a comment below with any questions or just to tell me how much you loved it. I read all of them.