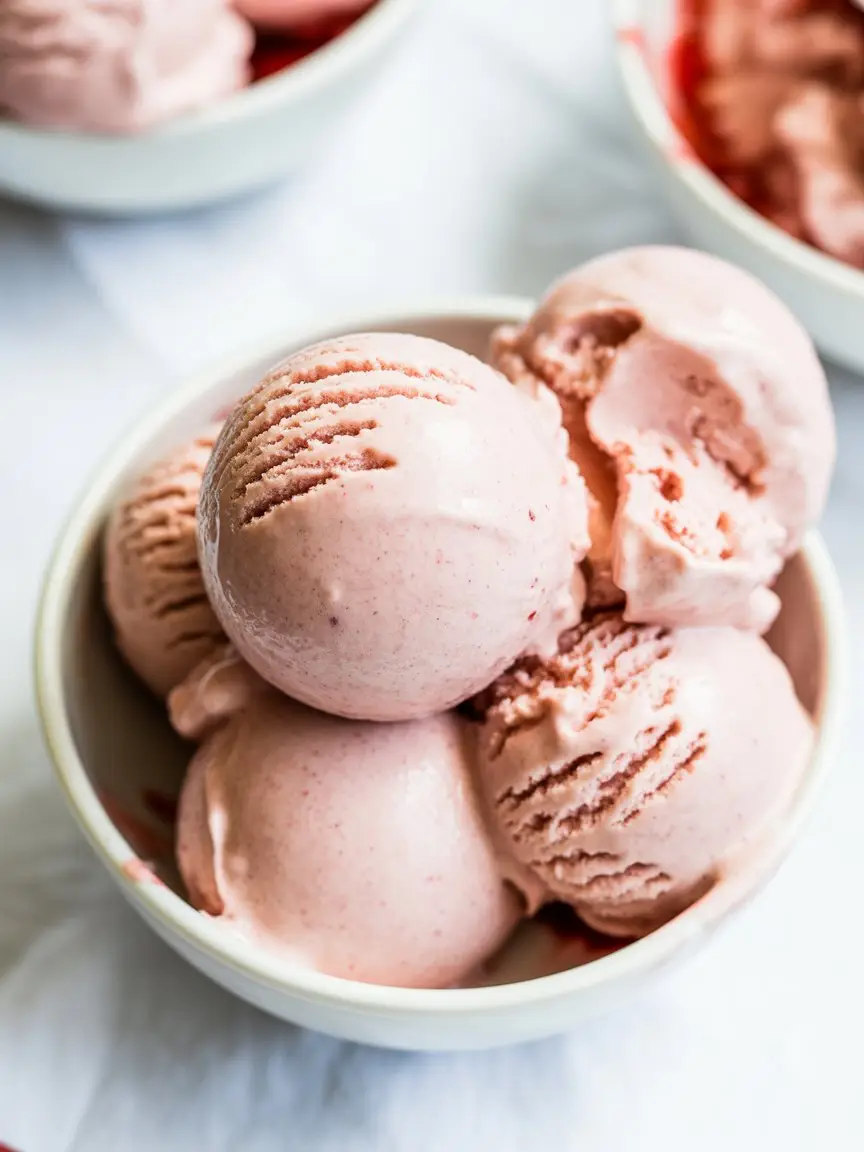
I have a bone to pick with most strawberry ice creams. They’re either a weird, artificial pink color that tastes like chemicals, or they’re just plain vanilla with a few sad, frozen strawberry chunks thrown in.
It’s a tragedy, honestly. Because real, fresh strawberry ice cream should be an experience. It should be creamy, packed with intense strawberry flavor, and make you feel like you’re sitting in a sunny field.
For years, my homemade attempts were… not great. They were either icy or the flavor was just a little weak. I was ready to give up and just stick to the disappointing stuff from the freezer aisle.
But then I figured out the secret. A couple of secrets, actually. And it changed everything.
This isn’t just another recipe. This is THE recipe. It’s the one that will make your friends and family think you’re some kind of dessert genius. And the best part? It’s not even that hard. I’ll walk you through it.
What You’ll Need
Here’s the simple list of ingredients. Don’t let the cream and milk fool you; using both gives it the perfect rich-but-not-too-heavy texture.
- 2 cups fresh strawberries, hulled and sliced
- 3/4 cup granulated sugar, divided
- 1 tablespoon fresh lemon juice
- 1 1/2 cups heavy cream, very cold
- 1 cup whole milk, very cold
- 1/2 teaspoon pure vanilla extract
- A tiny pinch of salt
- 1 tablespoon vodka or light corn syrup (optional, but recommended!)
Pro Tips
Okay, before you start, read these. These are the little things that make a HUGE difference between “meh” ice cream and “wow, I made this?!” ice cream. Trust me on this.
1. Roast Your Strawberries
This is the number one game-changer. Don’t just mash raw strawberries into the mix. Tossing them with a bit of sugar and roasting them for 20 minutes concentrates their flavor like you wouldn’t believe.
It also cooks off some of the water, and less water means less ice crystals. This is how you get that powerful, pure strawberry taste instead of a weak, watery one.
2. The “Secret” Anti-Freeze Ingredient
Ever notice how homemade ice cream freezes into a solid, un-scoopable brick? The tiny bit of vodka or corn syrup is your secret weapon. Alcohol and certain sugars don’t freeze solid, so adding just a tablespoon helps keep your ice cream creamy and scoopable right out of the freezer.
And don’t worry, you can’t taste the vodka at all. It’s purely for texture.
3. Chill Everything. No, Seriously.
Your ice cream base needs to be COLD. Like, refrigerator-cold for at least 4 hours, but overnight is even better. Your ice cream maker’s freezer bowl also needs to be frozen solid, usually for at least 24 hours.
If you try to churn a warm base in a not-quite-frozen bowl, you’ll just get a soupy mess. Chilling helps the fat in the cream firm up, which leads to a smoother, creamier final product. Patience is key here!
4. Don’t Ditch the Salt
It sounds weird to add salt to a sweet dessert, I get it. But that tiny pinch of salt doesn’t make it taste salty. Instead, it actually enhances the sweetness and the flavor of the strawberries. It balances everything out and makes the flavors pop. It’s a small step with a big impact.
Tools Required
You don’t need a full-on professional kitchen, but a few key items are pretty much essential.
- Ice Cream Maker
- Baking Sheet
- Blender or Food Processor
- Large Bowl
- Whisk
- Spatula
- Airtight, freezer-safe container
Possible Substitutions and Variations
This recipe is great as is, but feel free to play around with it! Here are a few ideas to get you started.
| Substitution | How to Do It | The Result |
|---|---|---|
| Dairy-Free / Vegan | Use full-fat canned coconut cream and coconut milk. | A super creamy, slightly coconut-flavored version. |
| Different Berries | Swap strawberries for raspberries, blackberries, or roasted peaches. | Creates a whole new flavor profile. Raspberry is amazing! |
| Lower Sugar | Reduce sugar to 1/2 cup total. | Less sweet, more tart. Might be slightly harder once frozen. |
Want to get even more creative? Try these mix-ins during the last few minutes of churning:
- Strawberry Cheesecake: Swirl in some cream cheese frosting and crushed graham crackers.
- Balsamic Strawberry: Drizzle a tiny bit of high-quality balsamic glaze on top when serving. It sounds strange, but the tangy flavor is incredible with sweet strawberries.
- Chocolate Chunk: Add a cup of your favorite chopped dark or white chocolate.
The Full Instructions
Alright, let’s do this. Just follow these steps and you’ll be golden.
Step 1: Roast the Strawberries
Preheat your oven to 375°F (190°C). Toss the sliced strawberries with 1/4 cup of the sugar and the lemon juice on a baking sheet. Roast for about 20 minutes, until they are soft and the juices are bubbly and syrupy. Let them cool down completely.
Step 2: Blend the Base
Once cooled, scrape the roasted strawberries and all their juices into a blender or food processor. Add the remaining 1/2 cup of sugar, the whole milk, vanilla extract, and the pinch of salt. Blend until it’s completely smooth.
Step 3: Combine and Chill
Pour the strawberry mixture into a large bowl. Whisk in the cold heavy cream and the optional vodka or corn syrup until everything is combined. Cover the bowl with plastic wrap and chill in the refrigerator for at least 4 hours, but preferably overnight. This step is not optional!
Step 4: Churn the Ice Cream
Pour the cold ice cream base into your frozen ice cream maker bowl. Churn according to the manufacturer’s directions, usually about 20-25 minutes. It should look like thick, creamy soft-serve when it’s done.
Step 5: Freeze (The Final Step!)
Transfer the churned ice cream into a freezer-safe container. Press a piece of plastic wrap or parchment paper directly onto the surface of the ice cream (this helps prevent ice crystals). Cover with a lid and freeze for at least 4-6 hours, or until firm.
Nutritional Info and Other Good Stuff
Here’s a quick look at what you’re working with. Keep in mind these are just estimates!
Approximate Nutritional Breakdown (per serving)
| Nutrient | Approx. Amount |
|---|---|
| Calories | 280-320 kcal |
| Fat | 22g |
| Carbohydrates | 18g |
| Sugar | 16g |
| Protein | 3g |
Meal Pairing & Efficiency
Honestly, the best pairing for this is a spoon and a quiet moment. But if you want to get fancy, it’s amazing served alongside a slice of angel food cake or a dark chocolate brownie.
For efficiency, make the ice cream base the day before you want to churn it. This splits the work into two small, manageable chunks and guarantees your base is perfectly chilled.
Leftovers and Storage
If you somehow have leftovers, storing them correctly is key.
Transfer the ice cream to an airtight, freezer-safe container. The trick is to press a piece of plastic wrap directly onto the surface of the ice cream before putting the lid on. This prevents air from touching the surface, which is the main cause of dreaded freezer burn and ice crystals.
It should keep well for up to 2 weeks. After that, it’s still edible, but the texture might start to get a little icy.
Frequently Asked Questions
Here are some common questions I get about making this.
Q1. Why did my ice cream turn out icy instead of creamy?
Ans: This is usually caused by one of three things: 1) Too much water (did you skip roasting the strawberries?), 2) The base wasn’t cold enough before churning, or 3) Your freezer bowl wasn’t frozen solid. Following the “Pro Tips” section is the best way to avoid this!
Q2. Can I make this without an ice cream maker?
Ans: Yes, you can! It takes a bit more work, but it’s doable. Pour the chilled base into a shallow, metal pan. Freeze for 45 minutes. Remove it and stir it vigorously with a fork, breaking up any frozen bits. Return to the freezer. Repeat this process every 30-45 minutes for 3-4 hours, until it’s frozen but scoopable. It won’t be quite as smooth, but it’s a solid alternative.
Q3. Can I use frozen strawberries?
Ans: Absolutely. Let them thaw completely first. Then, roast them just like you would with fresh strawberries. Frozen berries release a lot of water, so roasting them is extra important to cook that moisture off.
Wrapping Up
So there you have it. It might seem like a few extra steps, but the payoff is enormous. You’re creating something truly special, with a flavor that you just can’t buy in a carton.
You’re taking simple ingredients and turning them into a creamy, dreamy dessert that’s bursting with real fruit flavor. That’s pretty cool.
Give it a shot. I promise you can do this. And when you do, come back and leave a comment below. I’d love to hear how it turned out for you or if you have any questions along the way!